Let’s start with “why” you would ever want to remote mount an oil pressure sender.
- The sender may be too large for the space allowed where the oil pressure port is located.
- The idea of having two senders hanging off of one small port does not sound like such a good idea. You certainly don’t want to hang too much weight off of one T fitting and risk breaking it.
- You are after a clean look, and would prefer to simply have it elsewhere.
- This could also solve premature failure issues by remotely mounting the sender off of the engine. There are some instances when the sender can become “shaken-to-death”.
Regardless of the reason, remote mounting the sender is not too hard. Obviously, you need to find a way to mount the sender, but you also have to find a way to ground the body of the sender (when using the large, single terminal sender for short sweep gauges) when it is not threaded directly into the engine.
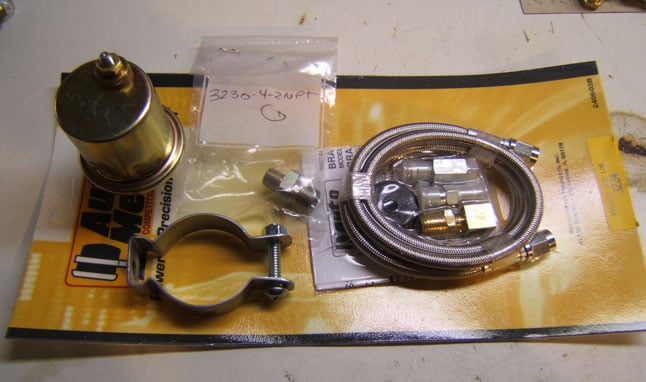
One of our favorite ways of remote mount sender is to use a 1-1/2” electrical conduit hanger bracket, available through most hardware stores. This will fit the large AutoMeter short sweep electric oil pressure senders. Next, obtain a stainless steel braided hose kit. We generally recommend a 3’ section of hose, and either -4an, or -3an. Either will work fine. The AutoMeter stainless braided hose kits come with the adapters to adapter to and from 1/8”npt (same as the tread size on the sender).
- Install the male 1/8”npt adapter from the hose kit into the engine oil pressure port. Depending on what engine you have, this may require an additional adapter to successfully install the male 1/8”npt fitting.
- Thread the stainless line on the above installed adapter, tighten the line, and route it to your new sender mounting location.
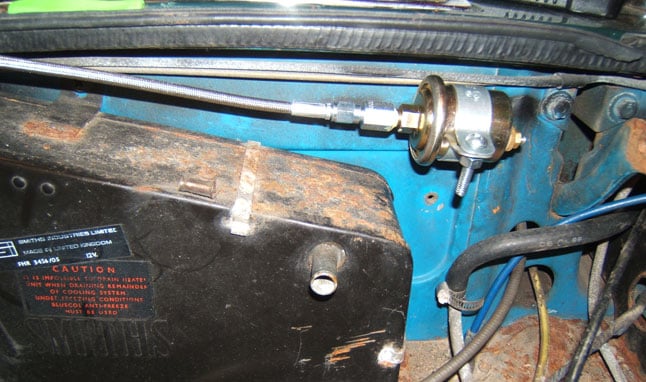
- Choose your new location for the sender, and install the new conduit hanger bracket. This bracket gives you a nice mounting foot, with a hole already drilled for mounting. If you are not mounting this bracket to something that is grounded, you may add a grounded wire to the mounting foot at this time.
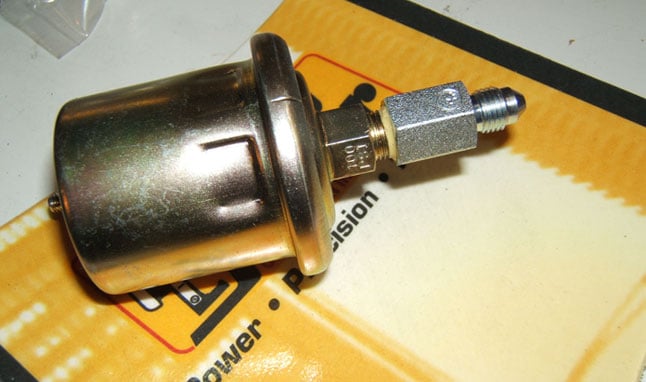
- Install the female 1/8”npt adapter that came with the line kit to the sender. Mount the sender into your newly mounted bracket, and tighten the bracket around the sender. Thread on, and tighten the stainless braided hose onto the adapter on the sender.
If you choose not to use stainless braided hose, and you want to use something non-conductive (such as nylon pressure tubing), just make sure to install a ground wire to the mounting bracket as mentioned earlier, which will transfer ground to the sender body.