AutoMeter recommends pre-assembling the gauge pod and pre-wiring the gauges installed to ease the installation. Follow gauge instructions for wiring. After wiring the pod, you should have your 12v power, ground, lighting power, and signal wires coming from the pod. These wires should be sheathed to keep the wiring tight and easily routed during installation.
Remove the passenger side dash trim panel by simply pulling the panel straight out to unclip it.
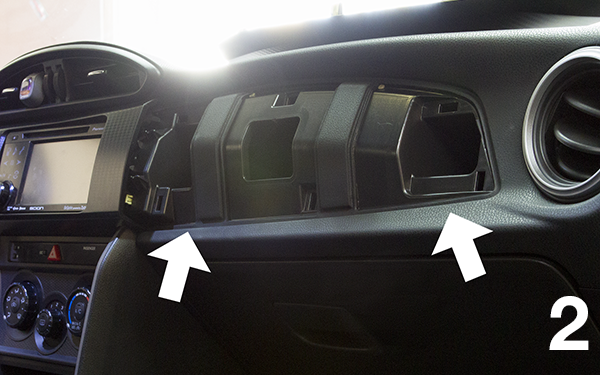
Remove the radio trim surround by pulling it straight out to unlatch the clips.
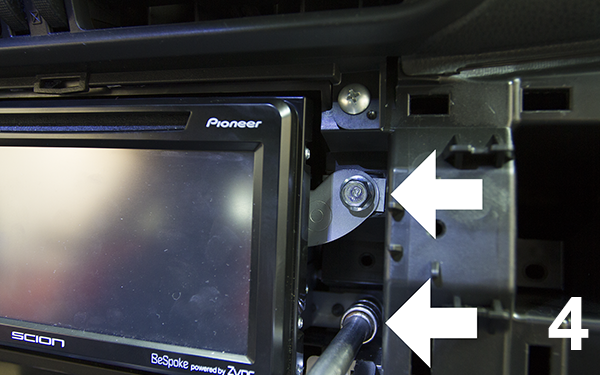
Remove the four (4) 10mm bolts hold the radio in, two (2) on each side.
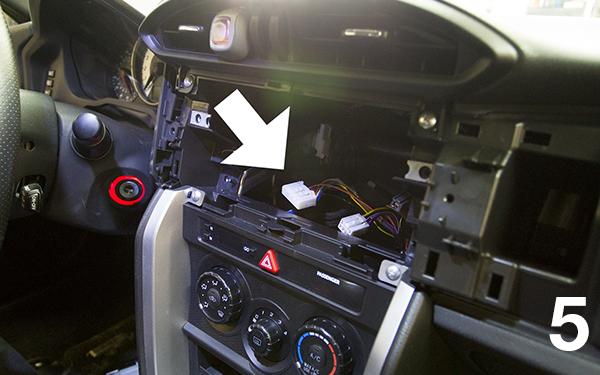
Unclip the connectors off of the back of the radio assembly. Place the radio assembly in a safe location.
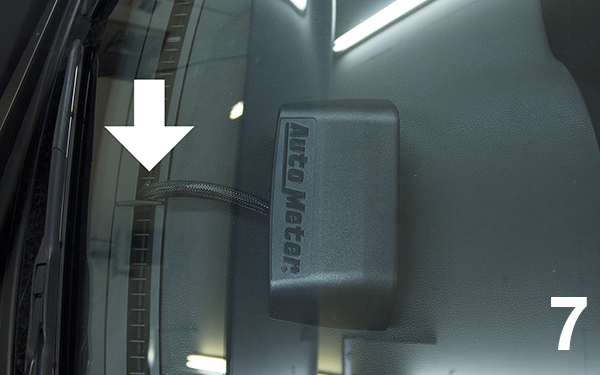
Remove the defrost vent trim by gently prying up the edges of the trim, starting with the edge closest to you.
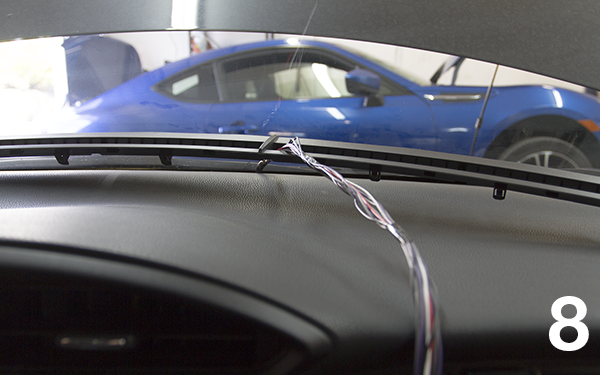
Route your wiring harness through the defrost vent. We chose the location just to the right of the center divider. When using a gauge harness that uses a large connector (Full-sweep electric oil pressure, wideband, boost/vacuum, etc.) you may need to remove a plastic rib on the vent in order to clear the connector.
Route the harness through the vent hole. If you shine a light, you will find a path that bypasses the ducting, allowing you to pull the harness through towards the radio’s normal location. Fasten the defrost vent into the factory location.
Locate a switched 12v power, lighting power, and ground locations and verify the gauges power on before continuing to the next step.
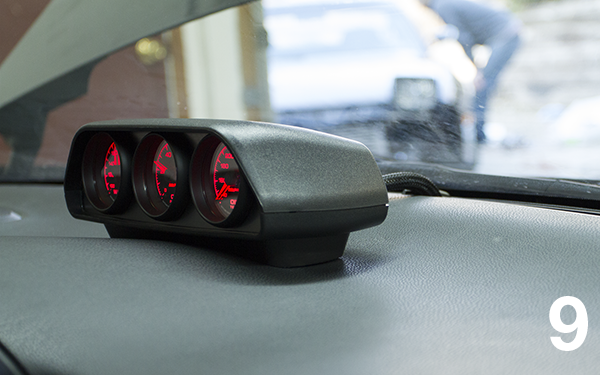
Next, position the gauge pod on the dash and centered it with the vents. Adjust it until you are satisfied with the position. Using the included alcohol prep, 3M tape, and 3M adhesion promoter, the pod was stuck to the dash in the ideal location.
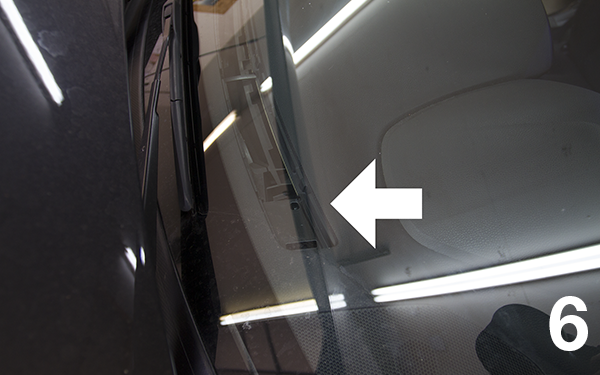
An easy pass-through is a factory grommet, located near the passenger kick panel. To access this, tip the glove box down by pressing in each side to bypass the bump stops.
Route the wiring harness behind the glove box.
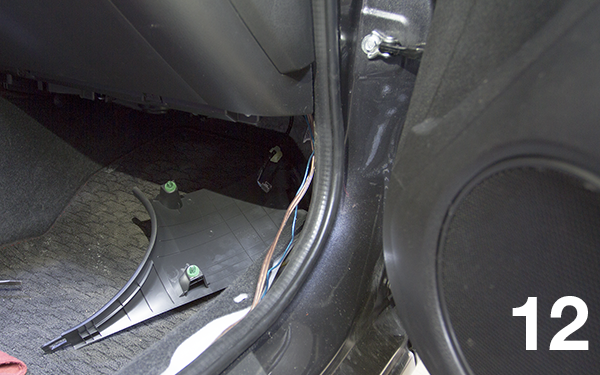
Remove the factory kick panel by undoing a clip (flat head screwdriver) and pull the panel out to release the locking tabs.
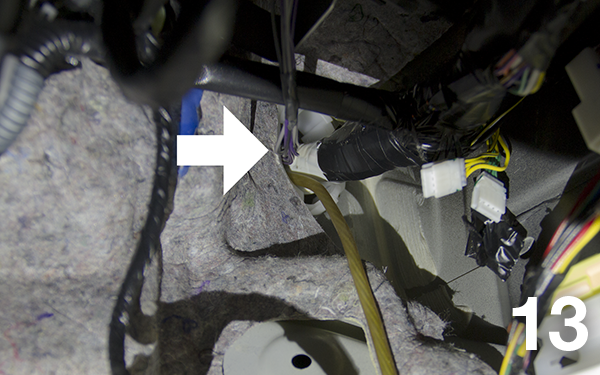
Route the sender wiring through the factory grommet into the engine bay.
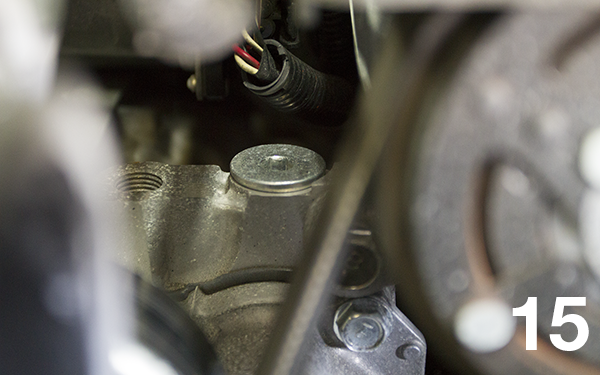
The oil galley plug is a great spot for the oil temp sender. This is located beneath the throttle body and AC compressor. We needed to extend the harness about 1.5ft to reach this area. The plug required a hex socket and ratchet to remove since the plug was on very tight.
This is threaded M18x1.5. You will need to obtain an adapter that is M18x1.5 male to 1/8” NPT female.
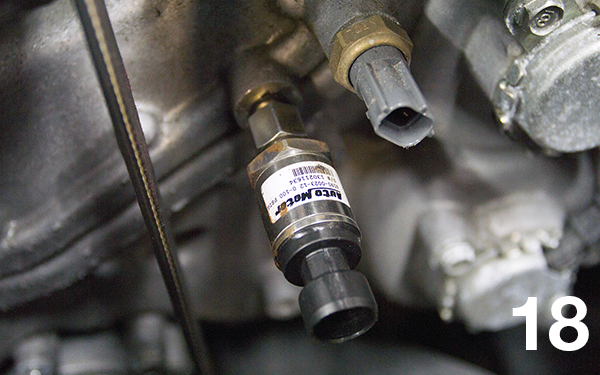
Oil pressure can use the factory sender location on the front of the engine, beneath the oil filter. This is threaded for 1/8” BSP. You may use the AutoMeter 2269 adapter to thread into this location. This required the oil pressure harness to be extended about 2ft.
Water temp requires the use of a heater hose or radiator hose adapter. This install used an AutoMeter model number 2280 heater hose adapter, plumbing into an easily accessible heater hose near the firewall.
After verifying the gauge operation, reassembly of the dash is the reverse of removal.