New body style Ford Mustangs utilize coil on plug ignition that requires a specialized adapter to provide an RPM signal to an AutoMeter tach or shift light. These are details of the installation of that adapter, #9117.
Now that the Battery is Disconnected, let’s get started:
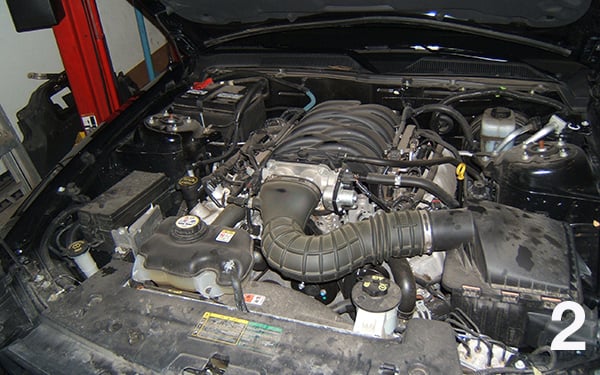
1. Remove the lid off of the power distribution box, located in the front passenger side corner of the engine bay.
Trying to install an AutoMeter tachometer or shift light in your 05 or newer Ford Mustang and aren’t sure where to start? Check out this write up by our Tech Department! We’ve broken down the installation of the necessary AutoMeter DIS Tach Adapter #9117 into a step by step procedure that will help get you on the road/track faster!
Important! First things first, after you open the hood, Disconnect one of the battery terminals before moving on with the rest of the install!
2. Remove the thick power wire from the power distribution box, using a 10mm socket.
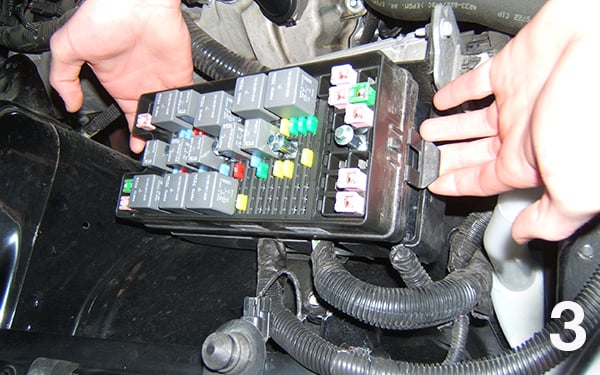
3. Using the release tabs at the front and rear of the power distribution box, you can simply lift the box up (when releasing those plastic tabs at the front and rear).
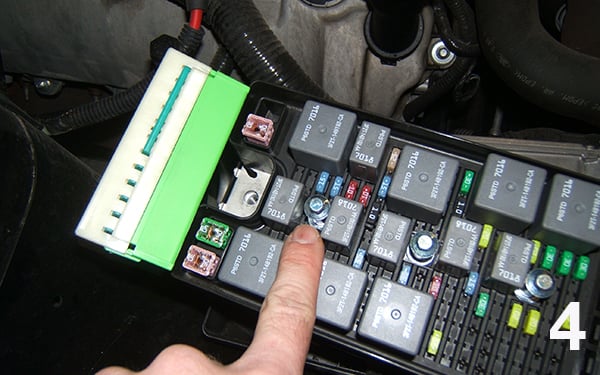
4. The green covered harness connector is the last connector towards the rear of the box. To remove this connector to make it easy to work with, use a 7mm socket and unthread the last bolt inside the top of the power distribution box. The bolt will not come out but will release the connector.
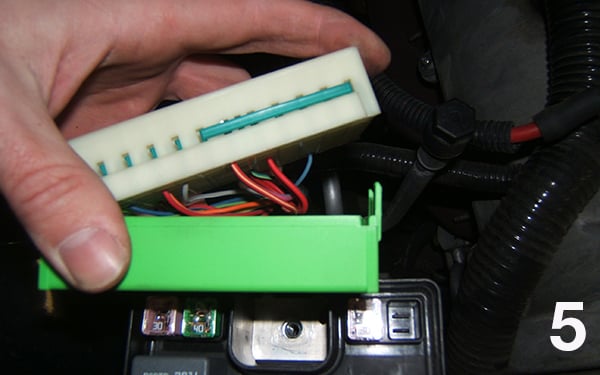
5. Remove the green plastic cover, simply by unsnapping the locking tabs.
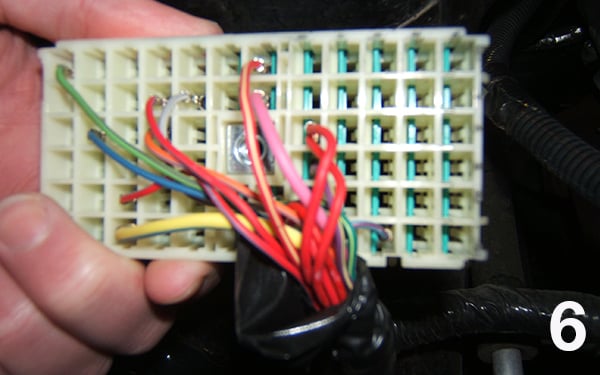
6. You are looking for the twin red wires coming from port C5. Note: Some ’06 and 07+ models will have these wires one port down (using the photo as reference) in location D5 instead. The individual ports are not individually numbered. The letters are cast into the bottom facing edge of the white plastic connector, and the numbers are also cast into the bottom edge of the white plastic connector, going long-ways. These are hard to see, but they are there.

7. Cut the twin red wires about 1 or 2 inches down from the connector. Twist the cut ends from the connector side together and connect to the solid red of the AutoMeter 9117 tachometer adapter.
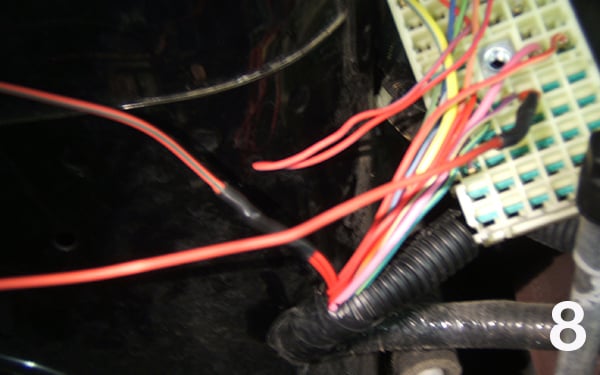
8. Twist the cut ends at the harness side together, and connect to the red/green of the AutoMeter 9117 tachometer adapter.
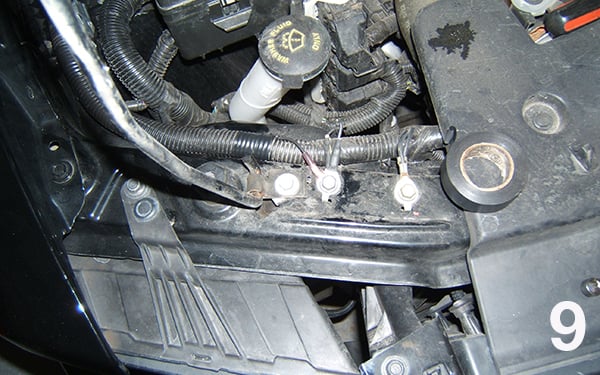
9. You may ground the black tachometer adapter wire at the top of the radiator core support nearby where there are already factory ground wires.
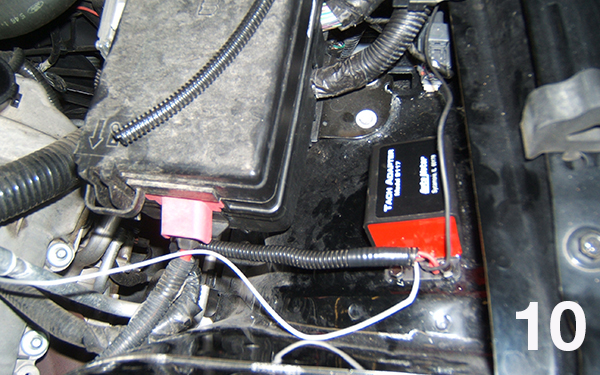
10. Carefully route your new adapter wires and mount your 9117 adapter. Re-assemble in the reverse order. Be careful not to pinch your new adapter wires during re-assembly.
11. You may mount the adapter, using self tapping screws on the wheel house, between the power distribution box and fender.
12. The gray wire of the adapter will provide you with a good useable, V8 tachometer signal.
13. The adapter is now installed, follow the instructions provided with your AutoMeter tachometer or shift light to complete the installation. When you’ve finished the mounting and wiring for the tach or shift light, check all connections and assemblies to ensure that everything is correct. Re-connect your battery and start the engine to check for proper operation of the product.