Tech Talk
Ford 4.6 & 5.4 Modular Motor Water Temperature and Oil Pressure Gauge Installation
Today, we are connecting Water Temperature and Oil Pressure gauges to a Ford 4.6L Modular Motor. These points will be helpful whether you are working on an original equipment engine or a swap application.
Water Temperature
A convenient water temperature port can be found on these engines on the left (driver’s) side of the engine block, below the last freeze plug. If the engine is installed while you are performing this installation, you will most likely need to locate this from underneath the vehicle. This port will be one of two different sizes, which are either 16mm x 1.5 or 3/8” NPT.
Remember to let the engine cool completely, wear eye protection, and be ready with a catch pan, as removal of this plug will result in a geyser of coolant.
It has been rumored that some of the earliest modular motors (from around 1992 to 1995) may not have this port. From our experience, everything 1996 and later has this port. To identify which size your port is, simply look at the plug that is threaded into the hole. If it uses an Allen wrench (inverted hex) to remove, then this is going to be a 3/8” NPT. All of our electric gauges come with this adapter.

If you have a plug that uses a regular box-end wrench or socket to remove (external hex), then this will be a metric, 16mm x 1.5 thread. The metric adapter number for our electric gauges is AutoMeter Model #2268.

Note: We do not recommend mechanical temperature gauges for this installation due to the shallow coolant passage depth (The mechanical probe may bottom out resulting in damage to the gauge or improper sealing).
Oil Pressure
For oil pressure, there are several different options.
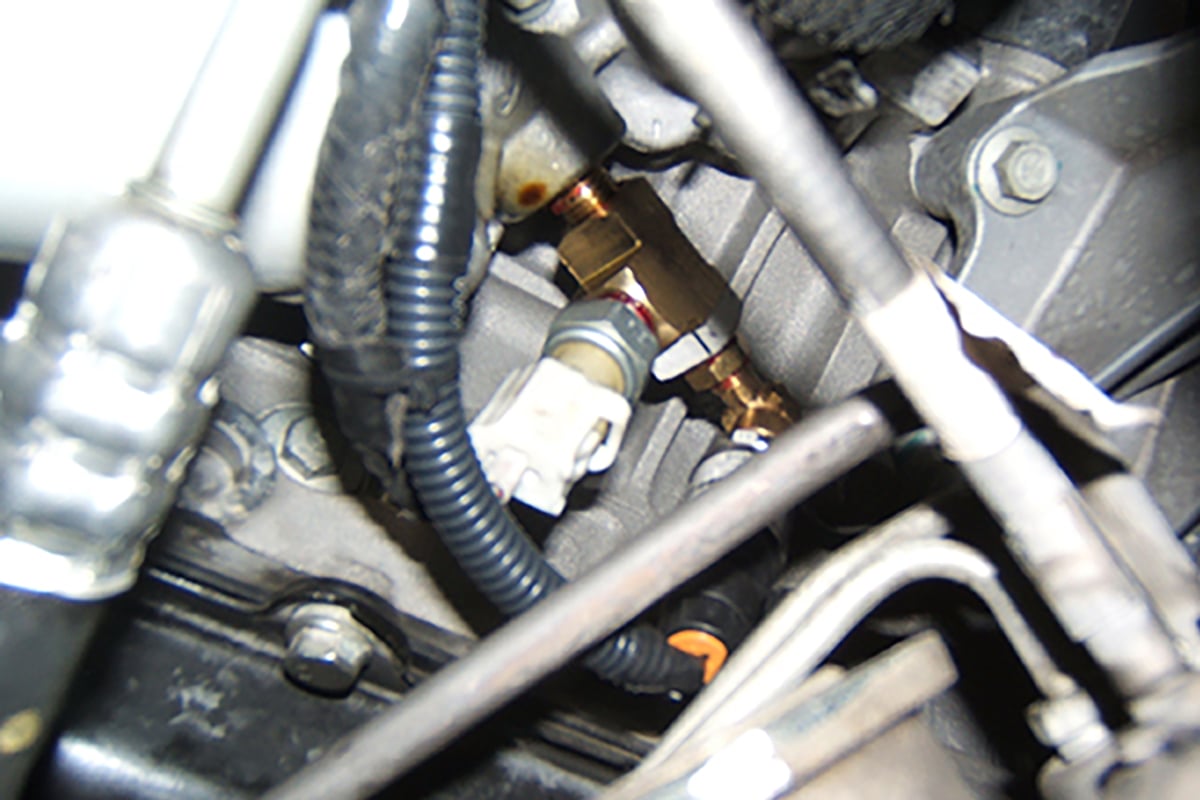
Some engines will have a second available port above the oil filter, next to the factory oil pressure switch. This will be 1/4″ NPT. The appropriate adapter will come supplied with your AutoMeter Oil Pressure gauge.

Some engines will only have one port, which the factory oil pressure switch is already utilizing. If your vehicle has a factory designed gauge to work with this motor (i.e. this is not an engine swap application), then retain the factory switch to keep the “check gauges” indicator from turning on and use a variety of hardware store-available brass fittings or performance shop fluid fittings to build a T to house the factory switch and your new sender.

If there is no factory gauge, you may then eliminate the factory sender/switch and use a 1/4″ NPT to 1/8” NPT adapter bushing to install the AutoMeter sender or mechanical gauge line (this adapter will be included with your AutoMeter Oil Pressure gauge).
When using the above-mentioned oil pressure port, you may choose to remote mount the sender to keep too much excess weight and strain off of the T or due to room constraints. You may use a stainless braided line kit, such as AutoMeter Model #3227 to accomplish this.
If you cannot or do not want to use the port near the oil filter, you may also find ports at the rear of either of the cylinder heads. These will either be 1/4″ NPT or 3/8” NPT. In most applications, there is not much room to work with here and will likely require a mirror to locate on a non-swap application. One way to make this port work is to use a 90-degree adapter into a braided stainless line such as the #3227 mentioned above allowing you to remote mount the sensor in a more convenient or out of the way location.