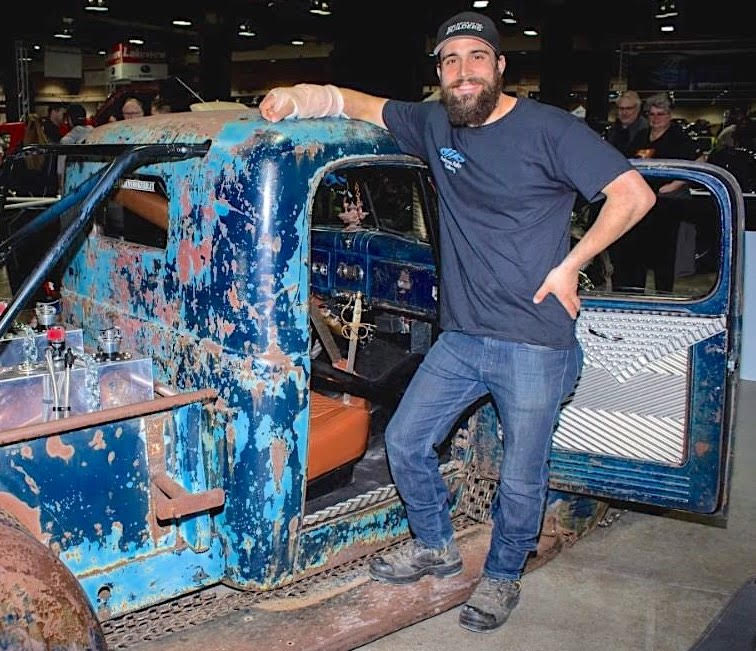
Written by Sculptor/Owner Warwick Andrews
@warwickandrews & @chainsmokerrat on Instagram
I have been into cars since I was a toddler. My dad repaired classic cars so when I was born, he bought me Hot Wheels that I played with constantly. He unfortunately passed away when I was six. My mom remarried and he was into things like canoe trips and outdoorsy stuff, which was great but left me with no real opportunity to have any sort of motorsports in my early life.


Ever since I can remember, I’ve known I had the auto itch. I just had no means to scratch it. When I was fourteen, my older brother bought a truck and needed help working on it. His truck eventually became mine and I realized that I had found a hidden passion. After 4x4ing that to the point where it was no longer road worthy, I bought my first car. It was a 1993 E36 BMW 325i (which at the time the car was only ~12 years old) and I picked it up for a steal due to it having a laundry list of previous accidents and current issues. I spent a lot of time on it and truly loved it like I had never loved a piece of machinery before.
I taught myself the basics through the failures of my 325i with help from online forums. Over five years of ownership, I ended up changing what felt like every single expendable component of that car. A vast majority of the time I owned it, I was fixing something and having to take the bus around. I loved my first E36 and had planned on keeping that first car for my whole life (I think we all say that…right?), but an E36 M3 came up for sale that I couldn’t pass up.
I had done a lot of work on that car including lots of small custom one-off stuff. I told myself I would only sell it to someone who would care for it as much as I did. Eventually, someone who was very similar to me came for a test drive and seemed to fall in love with it the way I had. He didn’t know much about cars but planned on learning through forums just as I had.
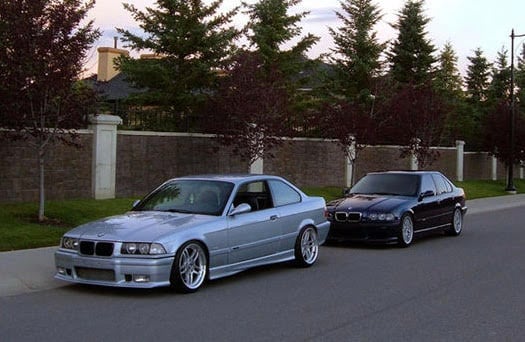

He bought it and it wasn’t very long before I had a call from him saying that he had hit a curb and had to have it towed. I told him to buy some beer and we changed the control arms and axle. Flash forward a few great years later and I was the minister at his wedding, which is a great testament to the amazing friends I never would have made without cars. Back to the timeline, I loved my M3 and since it had low mileage, I didn’t have to change the more basic accessory components like I did on my 325i. Instead, I got to dive into learning all about the aftermarket world and had the opportunity to mod the absolute snot out of it. It got to the point where it was stage 3 supercharged with meth injection and it had become a real piece of me (and not only because every cent I made went into it).
By this point, I was 21 and working on achieving my second life dream of becoming a commercial helicopter pilot (snowboarding being the first, which ended due to extensively tearing apart my knee in NZ when I was 18). I was awarded a grant that was offered at the time called the Canadian Civil Aviation Grant to help pay for my flight school and had shut off my life for a year in order to do so. I passed my flight test and scored a job flying tours in a turbine helicopter over the Columbia Icefields.

The work was seasonal and honestly not quite what I had been expecting, so I asked a friend’s dad, who is a successful business man, to dinner in hopes of getting some solid life advice from him. I explained to him that I had been buying and selling cars to pay for my life in the meantime, but that it was not sustainable to do without an actual retail location and business. He knew that my family didn’t have the type of funding options he did, so he told me if I wrote up a solid enough business plan that he would help fund the birth of my company, Andrews Auto Gallery. I did that and he liked it enough to invest some of the funds needed for me to start up my dealership. The rest came from the extremely tough decision of selling my M3. That was 9 years ago (2011) and in that business plan, I had it written that I had planned to buy a house in 5 years and to purchase a helicopter in 10 years (with the intention of offering a free flight with every vehicle purchase from my dealership). It was a long first few years getting off the ground, but I had my investor completely paid off within three years and from then on, it was just saving and building better inventory, along with learning as much as I possibly could about the inner workings of the auto industry.
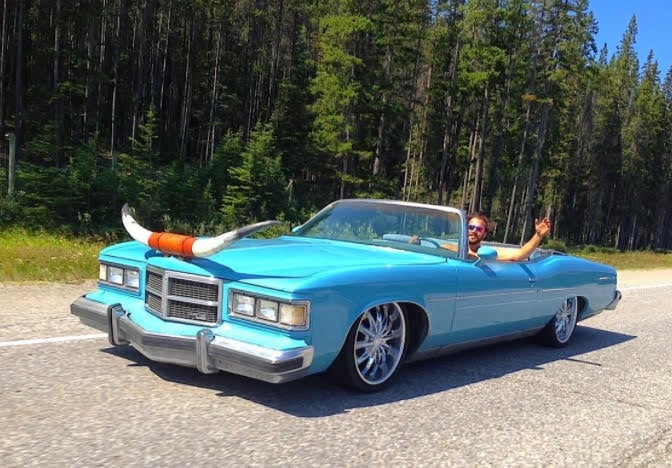
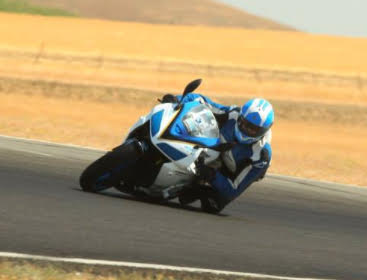
Over the years, I have collected many personal vehicles, including a dirt bike, MotoGP track bike, mud/mini monster truck, low rider, race/drift car, snowmobile, diesel towing rig, and have done lots of modifying in practically every aspect of automotive. However, I had never built a vehicle from the ground up using all my skills on one vehicle. Time passed from when I built my business plan and I had saved enough to purchase my house by 2018 (of which literally my only search criteria was 3 car garage). After that, I started to save up to buy my helicopter because I (still) want to buy an R44 and fly it while being my own boss. I had also started planning another low budget personal project for myself, which was a Rat Rod that I already had my eyes on…
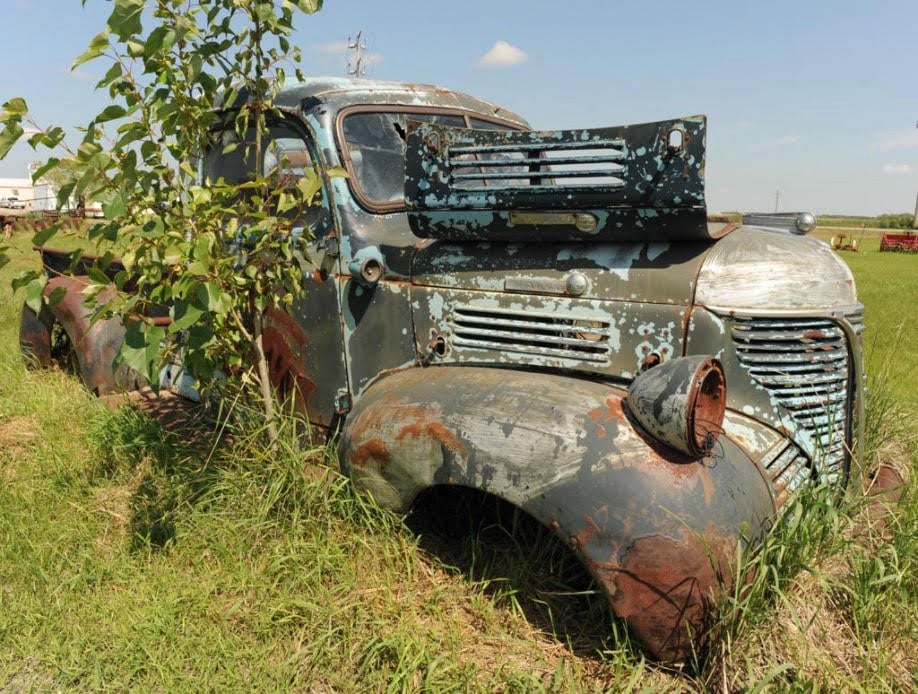
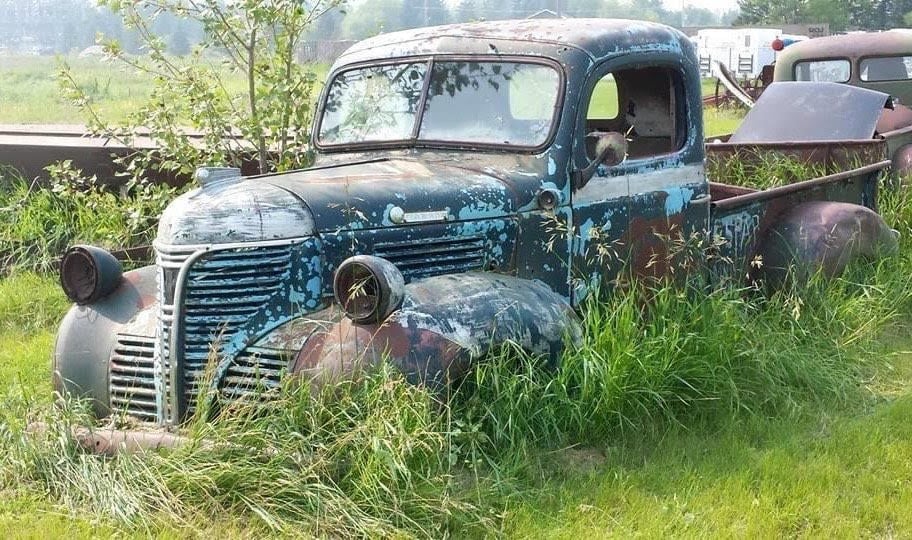
In 2014, I was driving across my beautiful country, Canada, and was close to running out of gas in the middle of the night when I stumbled upon a closed gas station. I slept in my truck out front waiting for them to open, but woke up just after the sun rose and decided to explore the area. Sitting beside this gas station there was a field with some old vehicles hanging out in the weeds. I went in for a closer look and there was a truck that really stood out to me. It was a 1940’s Fargo with the best looking patina I had ever seen. Every panel was matching and it had been through multiple coats of paint throughout its multiple lives without ever having a panel replaced. It had handwritten spots on it from the farm it was last used on in Miniota, Manitoba and everything about the truck was just perfect. I fell in love instantly and went and chatted with the owner in the house on the property. He said he would sell it if I decided I wanted it and to give him a call, so I got the number and made a mental note.
Since that day, I had thought about the build weekly and when I thought I had enough funds to spare for a cheap build I pulled the trigger. I decided I would take a quick hiatus on the helicopter purchase dream and would instead build my newer dream, which was my Rat Rod.
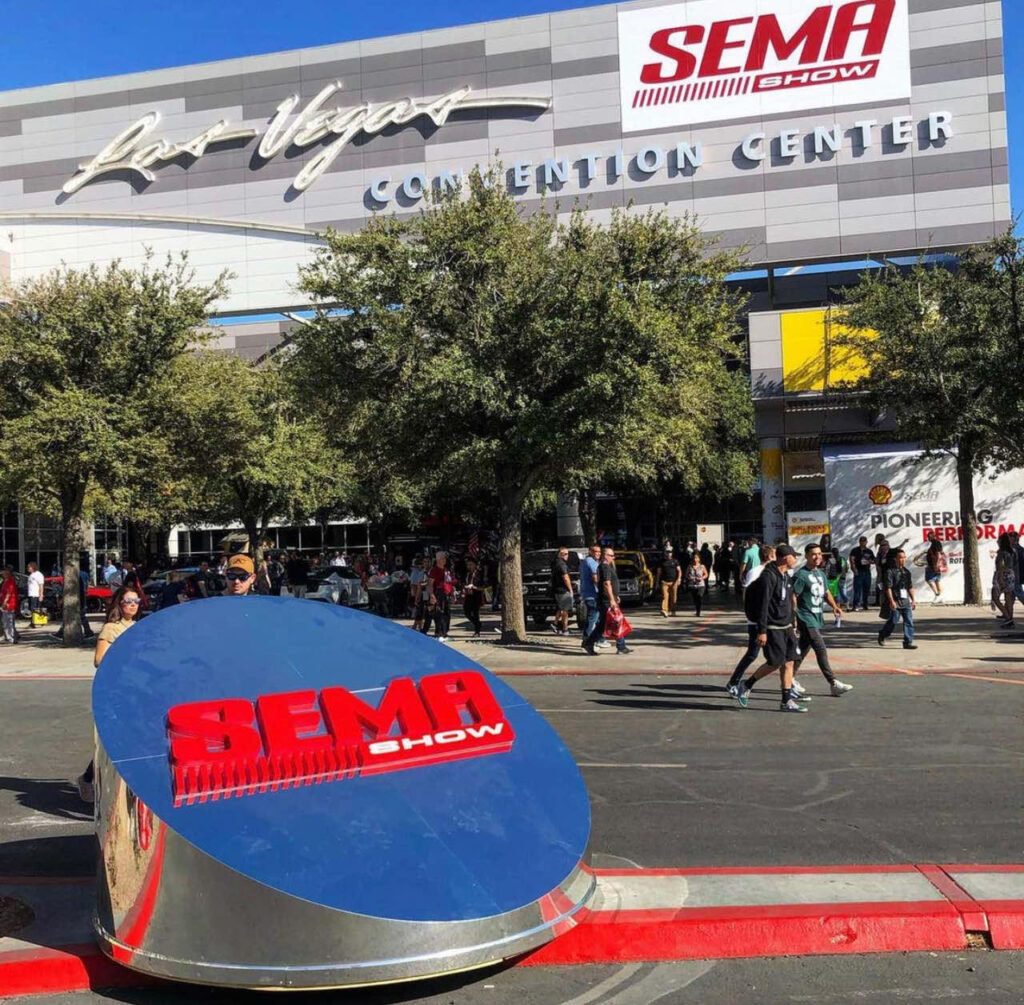
I go to the SEMA Show every year as an ‘International Buyer’ and over these years have built a very good understanding of the level of work and dedication it takes to build a vehicle worthy of SEMA. Although building a SEMA ride has been a life dream of mine for a very long time, originally it was never the plan to bring this Rat Rat project there. I was thinking the build would need around 25% of the time (and even more so money) that it ended up requiring.
With these guidelines, I was preparing to build a vehicle that I wasn’t worried about falling apart on the road, while still not breaking the bank enough to stress me out, and not causing a major change in daily shop routine. In the beginning, the Rat Rod build team consisted of myself and my two employees at Andrews Auto Gallery at the time, Brodie and Ryker. The one thing I hadn’t taken into account is my personal desire to go all or nothing on everything I do.
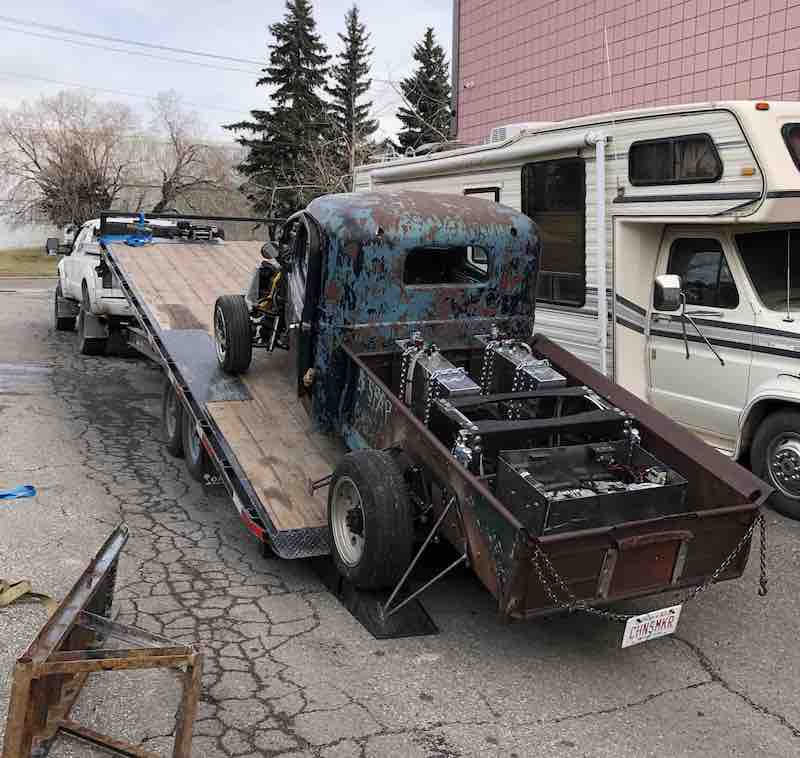
The time had finally come where variables lined up, so I called up the owner of the Fargo and purchased it for a very reasonable $1,500 CAD (1100USD), before having it towed 1,100km (~700miles) back to my shop in Calgary, Alberta. This is the point where I started filming my build series on Instagram, which documents a lot of the information I am about to explain.


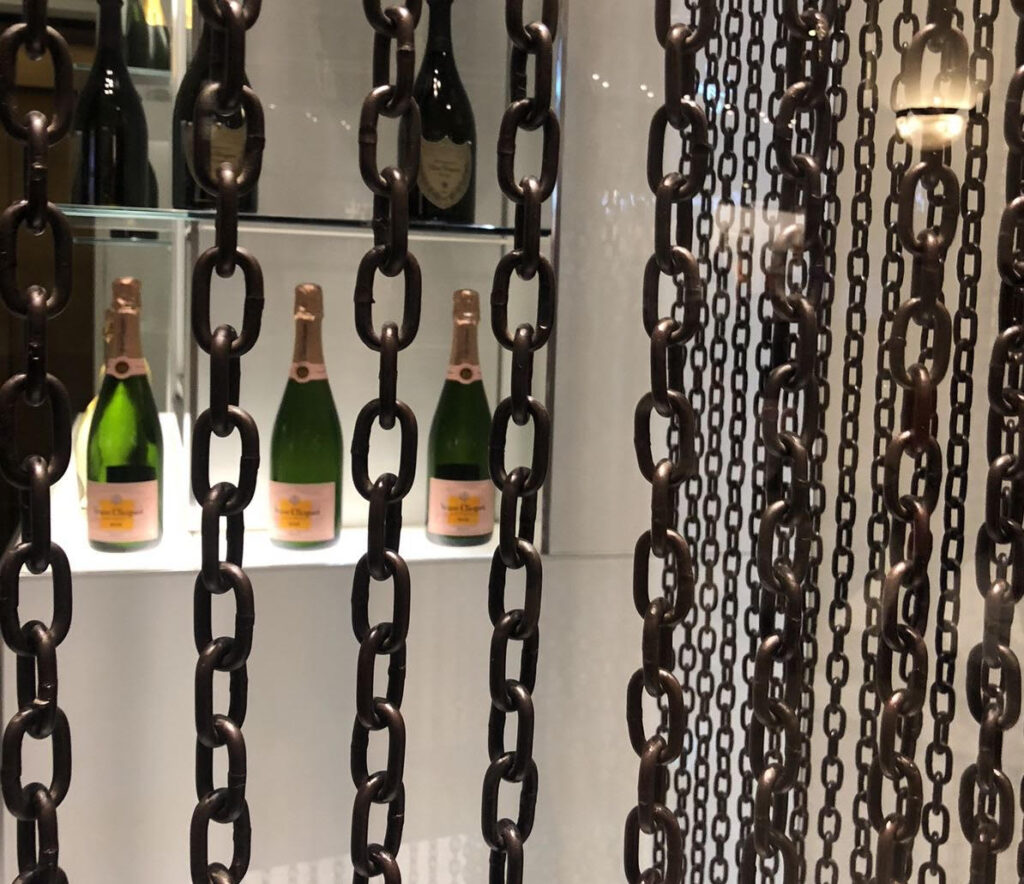
Timing of the Rat Rod showing up just so happened to work out where it showed up days before I left for SEMA 2018, which meant during that trip my mind was all charged up about the idea of building it and my creative flow was really firing on all cylinders. Everything I saw around me seemed to give me a new idea! We were on the strip and there was a restaurant that had chains suspended from the ceiling staggered about a foot or so apart, which I thought looked really cool. It was only when I walked past them at a certain angle that I saw them lined up properly side by side, and the beauty of it as a potential solid structure struck me. I took a photo of this and the idea never left me, slowly evolving to the point where it became the idea for the wide body kit on the truck. It was only a day or two later that we were walking down the strip and one of the SEMA guys had a truck that took off like a bullet from a stop light in a trail of dark smoke. The ideas with the chains that hadn’t left me plus the smoking of that beautifully nasty diesel engine came together in a eureka moment and the name Chain Smoker (CS in our story from hereon-out) was born.
After coming back from Vegas, CS sat for a few months while I acquired a 1996 Ram 2500 diesel to use as a donor vehicle. I found one (a manual trans to boot) and the plan was to build the 12 valve 5.9L Cummins engine in that Ram to the point where it was around 600 horsepower and 1200lbs of torque and basically just plop the body of the Fargo onto the frame of the Ram (…easy, right?).
We started disassembly and brought the Fargo down to individual panels and frame. Once it had been pulled apart and moved off the hoist then the Ram came in. I started shopping for engine components, all the while posting about the process on Instagram. Only a couple of days before pulling the trigger on a rebuild and more engine goodies from the US, I got a message from a friend who had been following my journey. He sent me a link to a similar 12 valve engine that had just come up for sale only a few hours from Calgary. It was built from a crate block using only the highest end aftermarket accessories and components (or OEM when not available) and was stated that it only a few thousand miles on it. The seller had the original build receipt, which shows it had been built by CPP Diesel three years earlier, for a build cost total of $39,201 USD.
The decision was a no brainer, so I drove down to check out the engine, which was currently installed in a six-door Ford F350 dually. We took it for a drive and it seemed to run quite well, so I dickered with him a bit and ended up buying the engine for $12,500 CAD ($9,200 USD) including a manifold and turbo setup, which I later sold for $1000 CAD. This was a dream for me because an engine like this would have been totally unattainable. Getting the engine was the point when the CS build went to the next level. Now, it was going to require all the components that are needed to handle that kind of power. I threw my old budget out the window and got as much help as possible along the way.
Once I had enough completed chain panels to sell my build, I needed to contact all my favorite parts companies to hopefully get them on board as sponsors. I also sold a bunch of toys near and dear to me to fund the growing cost, but they are all replaceable things. CS is not replaceable, so I was certain it was going to be worth it. With this new found power, we also heavily amped up the hours we spent working on CS with the shut down of the shop for all regular business during the last few months of the build.


I wanted to know more details on the engine, so I gave CPP a call and talked with the main guy behind the engine building. I started explaining the modifications listed on the huge five page receipt, hoping he would somehow remember what engine I was talking about it. After only a couple minutes, he already knew all the details on my exact engine. He said they had only built two engines in their history that are extreme as that build and he knew that it wasn’t one of them because it was out in his personal truck sitting in his parking lot, so it must have been the other.
He told me the engine had originally been commissioned for a fellow who was diagnosed with an illness in which he did not have long to live, so he called CPP and told them he wanted to build his dream truck and that he needed the craziest engine they could make. They did so, but just before it was finished being built he passed away. In the end, the first owner never got to use it at all. CPP then bought the engine back off his family and sold it to a guy up in Ontario. Technically, CPP was the second owner, but never putting any km on it. The Ontario owners finished building it and took it in to get smog tested (as they require in Ontario) and the truck failed. He tried to modify it to make it run as clean as possible, but in the end, he couldn’t get it to pass. He sold the truck out to Alberta where the smog check is not required. The new Alberta owner then drove the truck with the 12 valve in it for around 2,000 km (1,200 miles) before deciding to sell. Counting it up, we are now at four owners before me with just enough driving time for a perfect break-in at the 800 hp it was previously running while still giving it enough owners for the price to get affordable enough for me to get my hands on it.


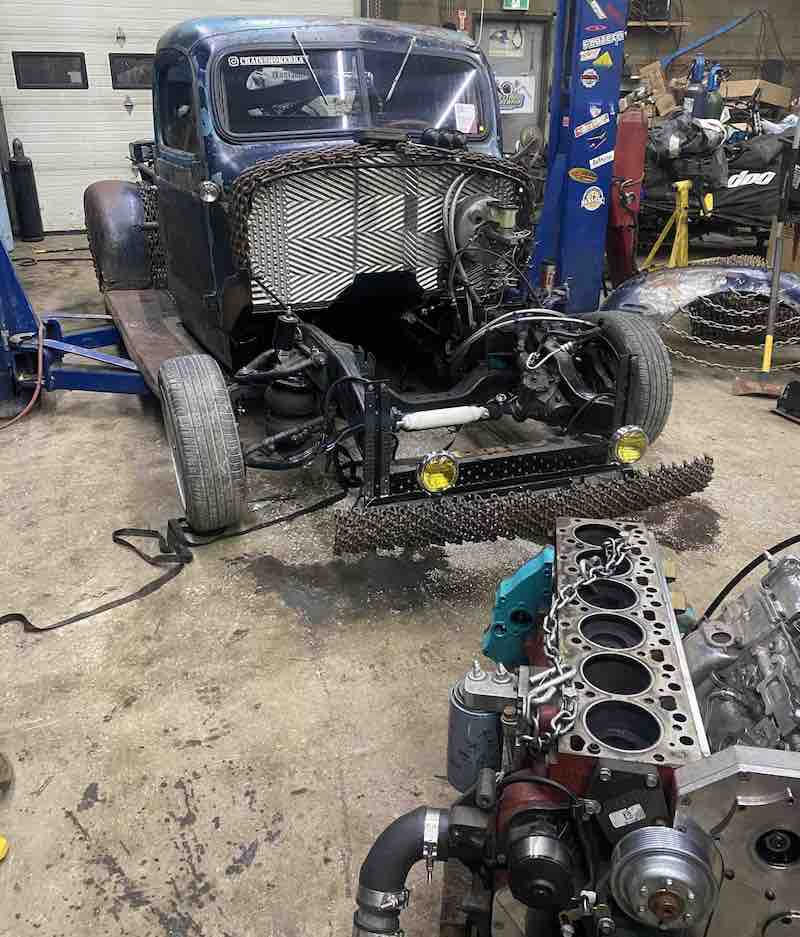
The next step in the build was the rear frame and suspension setup. The goal with the body height and suspension setup was to build it so the body would be able to lay on the ground at the lowest setting on the air suspension. To try and save some time and money, I bought the only available production large c-notch frame and airbag rear suspension kit online for the 2nd gen Ram frame. I started to prep for the c-notch by sandblasting down the Ram frame and removing all the original body mounts. We test fit our new fully built 12 valve engine in the frame of the Ram, which was the easiest part of the build because it was one of the only times where one piece was made to fit from the factory into the next. We then lowered the Fargo cab onto the frame rails and fabricated up a floor pan and transmission tunnel along with the firewall and the body mounts. Next, we channeled the body on the frame by cutting into the rear of the cab (the floor was already built with it in mind) so that it would sit as low as possible.


Once the cab was in place, we concluded that to reach the lowest height, the entire rear half of the frame was going to need to be custom-built. We cut the frame rails right behind the cab and built the new ones, all the while also shortening the wheelbase by 41 inches. The c-notch went in and dropped the frame 14 inches, which was the perfect amount for us to lay frame in the rear. Next up was installing the real 4 link setup. The kit had originally included a Panhard bar setup to attach to the axle. After installing it, we realized the downside of this setup was that it shifted the truck six inches from right to left when the bags went from full height to full low. That wouldn’t do, so we ended up completely redesigning it and going with a Watts link setup, which moved the vehicle up and down without any sideways shift. Next up was the front suspension, which unfortunately required extensive modification to make fit. We worked through our hurdles and achieved our suspension goal of laying fully on the ground when all the air is dumped from the bags.


For the body, CS is the perfect starting point since the panels are all matching with the same patina. There was no need to match any areas using fauxtina or similar paint techniques. This truck’s bodywork is 100% original, which is a proud badge that not many rides can wear. We washed and degreased the panels after it had sat in a field for what appeared like a century and after some time the two shades of brown transformed into two stunning shades of light and dark blue. Next up was moving back inside and building the pedal setup assembly and brake booster in the firewall, along with making sure we could still fit in the steering column along with everything else. We stripped out the remainder of the interior and used rust protection paint on all bare metal before applying sound deadening throughout the entire cab. Brodie cleaned out the old door internals and installed all new window regulators and locks from DCM Classics, along with new OEM components throughout such as all seals and electric window wipers, etc. Since the Fargo is the same as the Dodge, we were able to buy all Dodge parts easily from DCM, which was a godsend. We were also working on the front end frame rails and our rad support area, which was going to be especially tight. We were keeping all our cooling up front along with the massive 12V diesel inline 6 engine. This was already six inches longer than our engine bay, so that was going to need to be stretched.


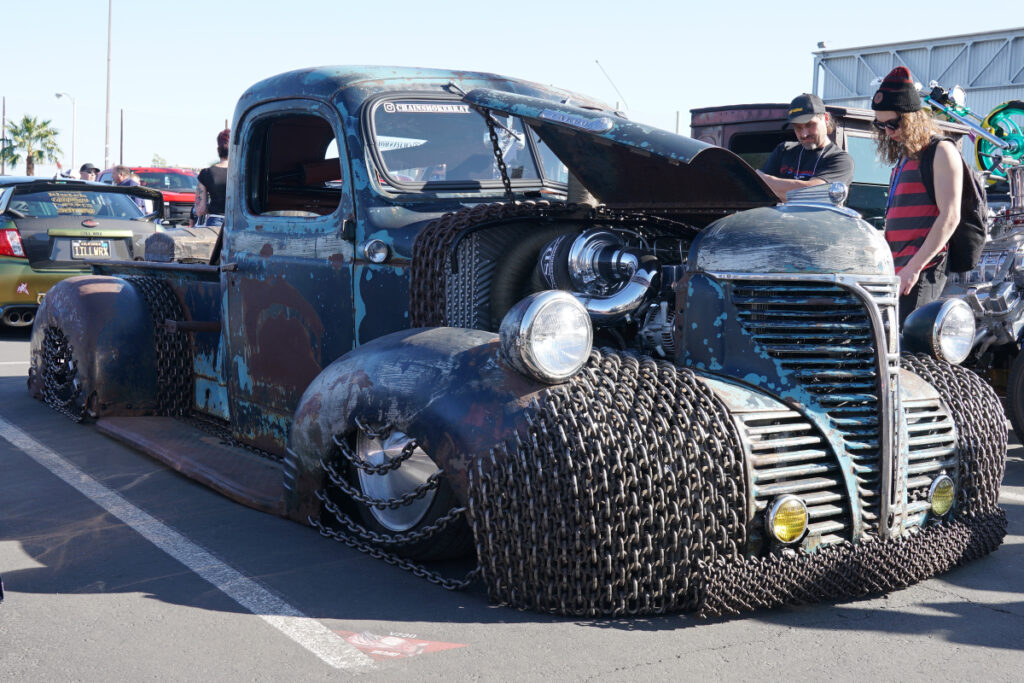
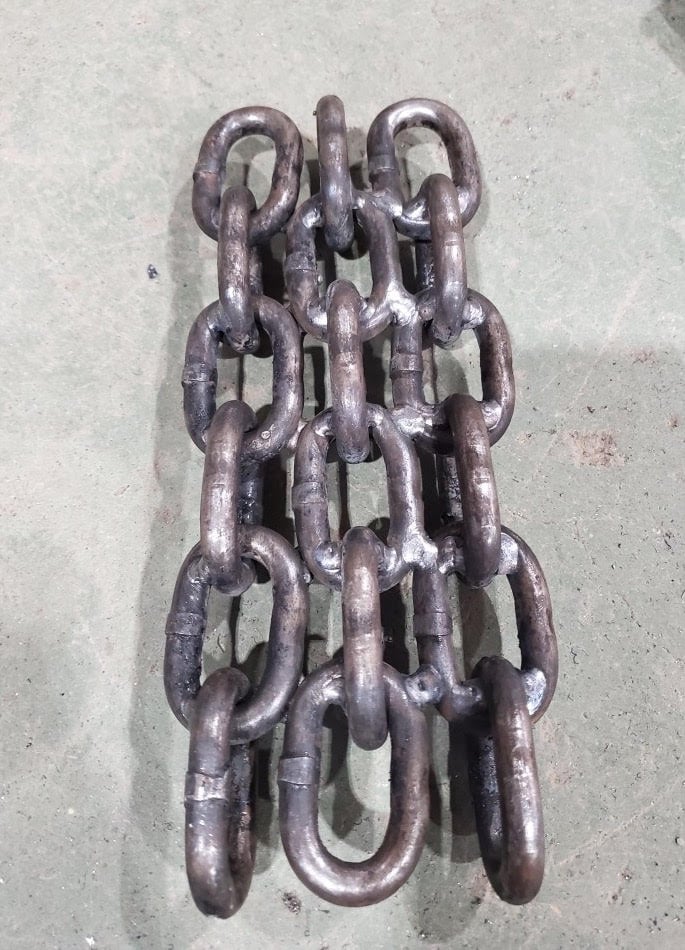
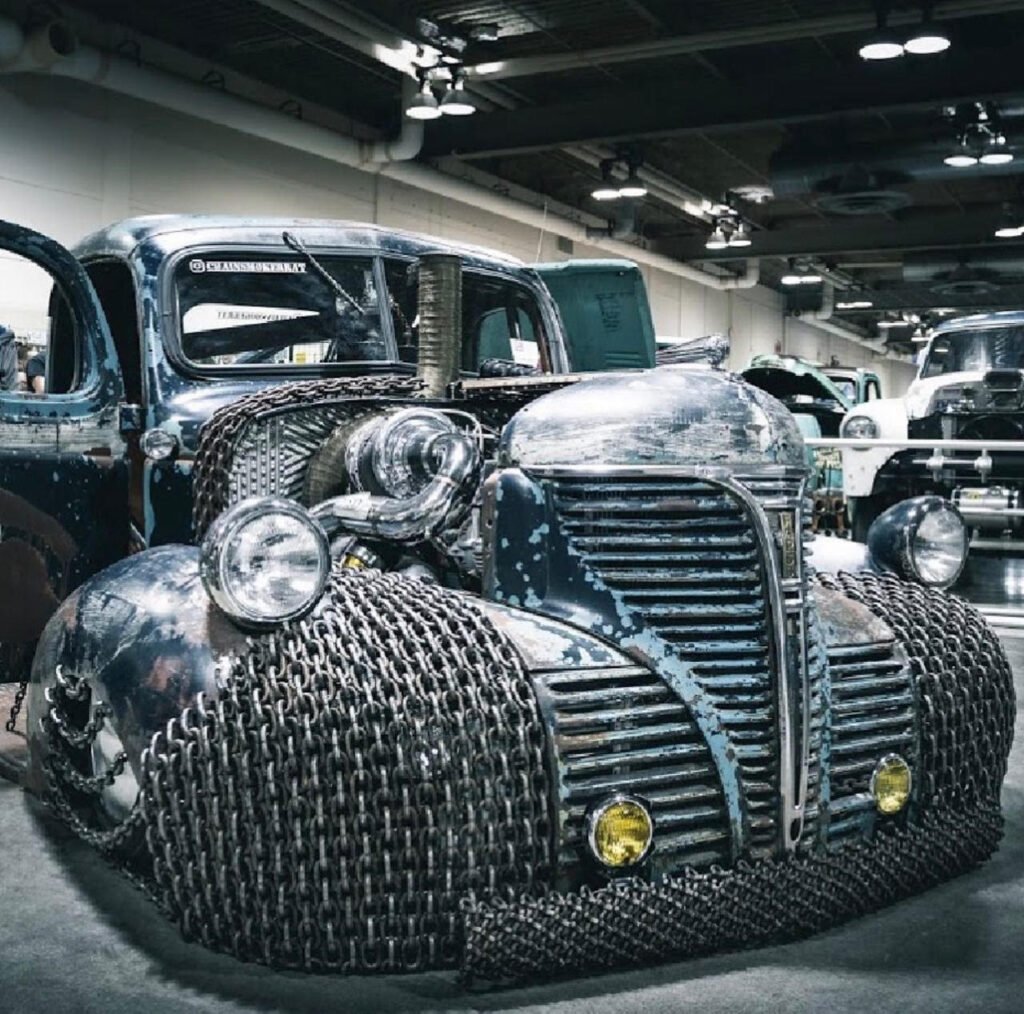
It was at this point that we started addressing those body issues. I implemented my original idea of the wide body kit built out of chains. For the past few months, I had been stacking my collection of chain from the local metal yard, Recon Metal, who was our first sponsor and got us much of the metal/interesting knickknacks on board. After I had put out the request for chains, it was only a month or so before they called me. They told me they had hit the jackpot with a 330 ft singular link of 3/8 inches chain from a decommissioned elevator of the same vintage as CS! It was exactly what I was looking for to widen the body out ~5-8 inches using only matching old chain as my canvas. I started out welding a small test piece to check how it would bend and move and to say the chain work was hard would be an understatement. Lucky for me, after the first hundred or so hours, I had a pretty good hang of how it moved and how to anticipate the changes that are brought by the heat of welding it.


Starting from the rear with the box flares, I built the kit moving forward. It took several months to build as I typically worked on it in the late-night hours behind the scenes when the shop was quiet and I had no distractions. The wide-body kit is welded strictly from behind/underneath so that all the welds are hidden and the chains appear to be floating. I also designed and built the chain fender skirts at this time, which are also a first of their kind and were designed to drag on the ground at the very minimum driving height. If set at that lowest height, it has titanium blocks underneath which also drag and will induce spark showers while driving down the concrete jungle.
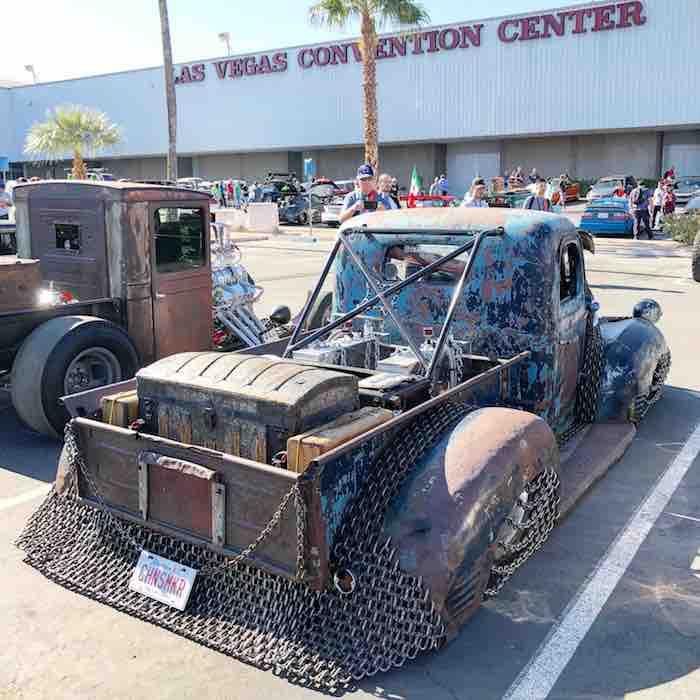
To power all the systems throughout CS, the build required a lot of accessory components that needed to find a home. These include the vast majority of the air suspension components, which consists of the air tanks for the bags along with an independent water separator, twin compressors for quicker fill, and an air valve for four corner height adjustment. Also needing a home are both of the batteries along with a large circuit breaker powering the whole ride. The large 220gph fuel pump also needed a home, along with all the lines and wiring required for all of these systems. The best solution was to hide everything inside a large antique treasure chest in the rearmost section of the box. I lucked out and found exactly what I was looking for on my local used marketplace. This chest came from the original family whose great great grandparents had brought it over from Scotland in the late 1800s. They didn’t have the space for it and were sad to see it go, but were also thrilled to know that it had found an excellent home on CS. It ended up looking a little goofy sitting in CS at full height, so I cut it down a few inches. It then needed more space than what we thought for everything to fit, so we built a false floor inside the chest so that the base of it actually goes down another 4″ below where the floor appears to end. Brodie installed all the components, which were spaced out like Tetris inside every nook and cranny inside that chest. He also added a shelf and the cherry on top, which is a tray built out of an old Canada Dry crate, that was cut up and heavily reinforced.


On the tailgate right behind the chest, there was a grain feed door that slides up and down on old wood rails. We used this to hide a hidden hitch receiver in the box. To access it, you remove that sliding door. During the evenings I was still plugging away at the chains and had finished both sides of the wide body kits up until halfway down the side steps. Since I had been collecting chains from Recon Metal I had some cool options on what to use to build a front bumper. I decided to go with v-bar tire chains from a set of snow chains for a semi-truck. They were filthy and especially hard to weld, but after it was finally done everything looked great.


At this point in time, a lot of the accessory components started showing up including the twin 64L fuel tanks, which we decided to mount in the box horizontal of the driveshaft to the left and right. The knives from around the world also started showing up, which consist of an antique Spanish Toledo blade being used as the hydraulic drift brake handle, an antique Damascus Greek Gladius sword for the NV4500 manual transmissions shifter, an American Bowie knife which is used as the e-brake (This is attached to the e-brake assembly from a Toyota 4Runner which is installed under the seat. In order to initiate it, you pull it straight out from under the seat and then to disengage it you twist it and it pushes it back under the seat), and two antique Japanese chef knives which were cut up and transformed into door handles.


By this point, Ryker had moved on so the full-time crew had come down to just myself and Brodie. I went through my rolodex of car friends to help with all the fabrication and called an old friend, Cory, who I knew from junior high school, who then brought on board another friend, Dave. Since CS had so much more horsepower than originally planned, we decided it would be in my best interest to add an additional tube frame to the chassis, along with adding a full roll cage into the cab that also exits out the rear, which Cory and Dave did an extraordinary job of fabricating. We also had another fabricator by the name of Carver come on part-time to help mainly with the panel support system since the chains aren’t exactly feather-light and we can’t be losing parts down the road.


After all this building, I finally had enough physical material, photos, and plans to start contacting the sponsors I was hoping to work with, AutoMeter being one of the top on that list. Most sponsors were interested, but only with a certain level of exposure, SEMA being one of the highest level. Up until this point, we had not planned to build for SEMA, but it was with this requirement that we made the huge decision to build CS for SEMA 2019. Time was tight and so far we hadn’t been working with deadlines. I was confident (and granted a little naive) that we still had more than enough time to make it. To my delight, AutoMeter accepted our application and I was able to get my dream gauges along with the opportunity to represent one of my favorite companies along the way! My next hurdle was the SEMA entry, which in order to actually get into SEMA as an exhibitor you must actually be sponsored by a company that has a booth already there. AutoMeter had those spots already filled, so we were extremely lucky after some searching to get accepted by Northern Radiator as one of their outdoor vehicles. Since we were now a part of SEMA, this also allowed us to enter into the Battle of the Builders, which is a competition open to all SEMA vehicles, narrowing down roughly 2,000 of the highest quality entrants in the world to 300 finalists who compete in four categories until they come up with a winner.
Being on the Northern team also meant that we were now going to be rocking a fully custom cooling system. I first made cardboard templates to get the exact measurements and then got exactly what I needed shipped over. In order to get it all to fit as best as possible while still having as much cooling area as possible, I ended up having to build some pretty interesting brackets, but in the end managed to squeeze in the radiator along with its electric fan, the intercooler, and the A/C condenser along with its electric fan. There are many areas on the front end that are 1/4″ away from each other in multiple spots. It honestly still blows my mind that everything sits as perfect as it does, but it does.

Northern also introduced me to a contest called the International Ratical Rod Build Off/Drive Off. Northern had previously sponsored another Canadian builder who came down as a part of the event the previous year and Northern was wondering if we were joining. The International Ratical Rod Build Off/Drive Off is a competition where teams from around the world start building a fully custom rat rod starting on January 1st, and complete it by October before shipping it to the middle of the US in Lincoln, Nebraska where they are then driven cross country with the final destination Las Vegas, Nevada for the SEMA Show. The builders then vote within themselves for their favorite ride that completed the whole journey (other than their own), which is then crowned the winner. It was already mid-July by the point that I found out about the event. However, after going back in the photos on my phone from documenting the build I realized that we started disassembly on January 7th, which put us right on track with the other builds. I contacted the coordinator and after many emails with the entire committee, CS was accepted into the contest!

This news gave us all more drive and we turned up our work schedule as much as possible, fully dedicating all hours to building and shutting down all usual dealership work for the next four months. I was still doing long days and then again nights working on the chain wide body. This was the point where we stretched the front grill along with the hood seven inches forward in order to fit all the cooling under the grill, along with the massive diesel engine. The front fenders had to stay where they were because of the wheels sitting inside them, so there was now also a large gap between the front grill and the front fender, which originally were touching each other. I filled that gap with the largest intercooler I could possibly fit, leaving it sticking out the sides which looked pretty cool, but the lack of ‘flow’ between panels wasn’t overly cosmetically appealing to me. I knew I was going to have to fill in that gap with chains transitioning the two sections back together in a way that smoothed the front end out and brought back that proper flow. I decided on a draping look that followed the curve of the front end and the creation of these two panels ended up being the most difficult part of the build. The wide body so far had given me lots of practice welding chain, but adding the curve aspect to it completely changed the game. I ended up having to cut down all four corners of every single open-faced link in order to keep them lined up properly without deviation. This solution came after many hours of experimenting and failing. This was all especially difficult with the addition of strictly welding the chains from the back so that the welds aren’t visible, which also means that I never knew how it looked or lined up until I put the front chain transitional section pieces in place. This lead to me installing and uninstalling the front end what felt like thousands of times.
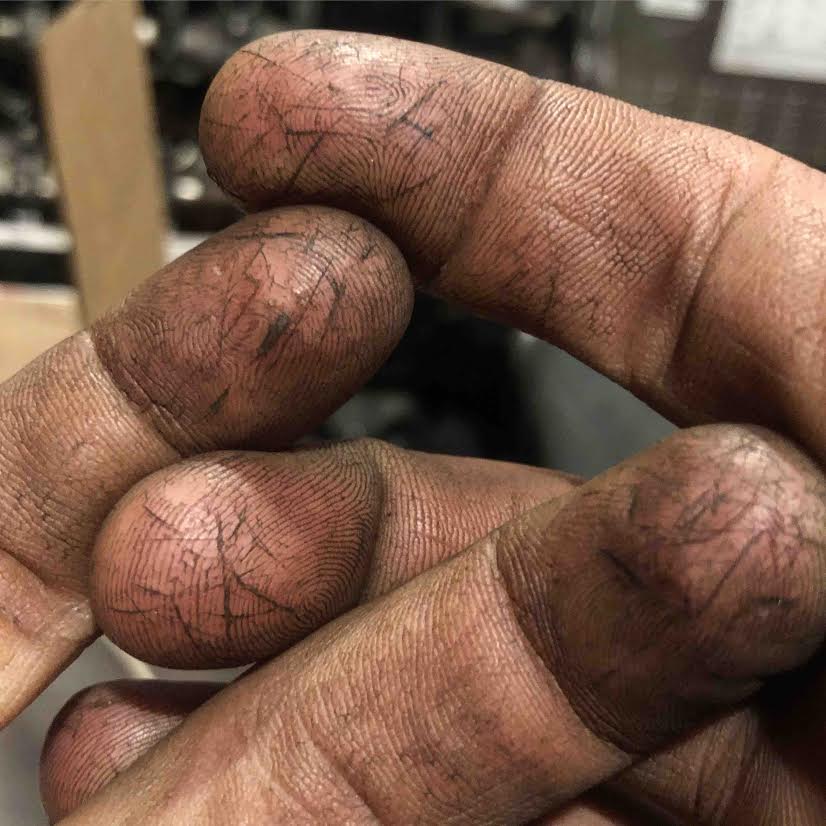
I’m not typically a patient guy, but when it comes to dealing with something I love there is no end to what I will do to make it perfect. That’s also a curse because these long nights did wear on my mental and physical health. It was during the construction of these front panel sections that I took my first trip to the hospital after accidentally welding my finger through the chains and thru a tiny hole in my welding gloves. That would have been no problem if I hadn’t kept wearing my gloves and then did it again a few hours later. I went home after this for my usual few hours of sleep and passed out while standing in my bathroom. When I woke up, I went to the hospital where they gave me an EGT and blood test. I was given the okay, so I went home for a couple of hours of sleep before I was back at the shop working on the panels again.


After finishing the front chain transitional sections, the wide body was officially complete. I moved onto the last chain section, which was the rear bumper. One of the sacrifices I had to make for this build was selling my Harley, which was a Road Glide that I had put a 26″ front wheel on along with many other things. On the rear end of that bike, it had a swooping back style rear fender and then beside that on each side there was a saddlebag with small transitional steps between the two. I came up with the plan to recreate that same swooping style on CS rear bumper and then to have a small transitional step into both of the rear fenders, which will flow in the same pattern, with the wide body kit seamlessly integrating into the whole thing. To make sure it was as strong as possible (since it is the rear bumper after all) both sides of the bumper were fully welded.


Once all these panels were complete and the body was mocked up, we were finally able to check things like body clearance on the airbags. Unsurprisingly, we ran into a host of issues, such as the oil pan hitting the ground below the cross member. To fix this, we could have spent top dollar on a low profile pan, but we have the resources and ability so instead, Dave built a fully custom oil pan out of the original, which is three inches shorter, but much wider so it still has the same oil capacity. At this same time, Carver was building the floors inside the rear box surrounding the four-link suspension. I was working on lots of small “easter eggs” around the truck, such as a pair of 1947 Canadian dimes filling a couple of holes in the cab and a rag in the old gas cap which if you look closely actually says “chains” on it. There is also a toonie in the grill which has gold inside with silver/chrome surround, which I turned into a theme for the front end. I followed it in three other spots in the front: the French fog lights with their yellow/gold lenses and chrome surrounds, the Fargo emblem with a polished gold center and chrome surround (above the toonie), and the intercooler piping which is wrapped in gold heat wrap and has all the chrome goodies surrounding them.


Right around this time is when a box showed up at the front door with the name AutoMeter on it, which ended up being chocked full of magic! This box included three top of the line and gorgeous Spek Pro gauges. They were later mounted on the exterior in waterproof cases on top of the chain filler section in front of the cab body. This means boost, EGT, and tach are all visible right through the windshield or if it’s a nice day the windshield flips up a full 45-degrees so they are right in front of your face. This box also included a full set of Chrono dash gauges, which show the speed (in km and miles), oil temperature, coolant temperature, fuel level, and oil pressure. These were all installed with aluminum inserts and makes the dash pop like none other.


To put down the power numbers that I wanted, I did my research and it led me to a company called Stainless Diesel, which makes compound turbo kits for diesel trucks. The turbos I decided on are a 74 mm and a 96 mm. They both have 5 blades, which allows for more airflow, along with having a much louder turbo spooling noise. Stainless Diesel helped us with acquiring these turbos, along with everything needed to run them with our 6 bt Cummins setup. This setup has been proven to run over 1,200 horsepower and 2,000 lb of torque at over 100 psi, but it will all come down to how much traction the truck can get and how much of it can put down. The wide body in the back was designed so that it will fit around a 15″ tire in the back, but 100 psi is a LOT of boost, so I am expecting more around the 70-80psi mark fully turned up which will hopefully enable us to still reach those elusive 4 digit power numbers. We also got help from XDP and have an Attitude Adjuster, which is a knob mounted inside that adjusts the fuel mixture and when turned acts as a tuner making the truck go faster and smokier with more fuel or slower and cleaner with less. Since the turbo kit we got from Stainless Diesel was made for a 2nd generation Dodge Ram (which our physical setup is very far from), there was a lot of custom piping and exhaust work that had to be done. For this, I brought in another new member to the CS team, Kale. The turbos presented themselves with a few large fitment issues, such as not having enough space for the exhaust between the turbo outlet and the firewall and trying to get the hood to still fit with the piping. I decided to lose the bottom section of the passenger side hood and to run with 3 out of 4 hood sections only, showing off the turbos full time through the missing section.


The interior leather and carpet work is the only part of the build I fully contracted out at Auto Marine Custom Upholstery. I wanted the seat, steering wheel, headliner, sun visors, and pillars in high-quality authentic leather. I went with a design that took cues off the 2019 Bentley Continental to create, which I liked because it goes against the norm by having diamond stitching on the outside portions of the seats and smooth leather on the inside. That design was also carried through onto the steering wheel and into the headliner. It was all done in high-quality brown leather, with a double diamond stitch pattern and subtle blue thread tastefully hidden throughout. We had to coordinate with them during the build since the roll cage was being built with extremely tight clearances, and all these interior panels still had to fit on the body behind it. The interior shop first built the foam frame of the seat so that we could then build the cage around that, then once the cage was built, they wrapped the seat in leather and it went in. To wrap the rest of the interior panels, we had to bring the cab body to them with the roll cage in it. We found out while the cab was in the interior shop that we had been accepted into the top 300 for Battle of the Builders, so excitement was up about what was to come.

A month away from SEMA, half of the crew came down from illness one by one. I was lucky enough to have another old friend who has built a few muscle cars over the years, Branden, who was willing to step in and help by building all the fuel and brake lines and then plumb them properly. They all needed to fit inside small holes through the fully boxed frame without chaffing, along with all the other air lines, wiring, and the kitchen sink. We also did the brakes at this time, going with larger slotted EBC disc brakes in the front, and then got rid of the drums off the Dana 80 in the back in favor of the same larger disc brake setup.
Fast forward another week or so, I am at the point where I am so overwhelmed and overworked that I have a mental breakdown and come to realize that with the guys being out sick for so long and with the other setbacks, we weren’t going to make SEMA with our current to-do list. After talking with the crew, we decided that we were going to put the paint for the engine/trans on hold along with the powder coating of the frame/chassis, amongst over thirty other small/medium customizations. It was with this plan that we were put back on the path for SEMA 2019, along with giving us room for improvement to come back in the future.
Although we were back on track for SEMA ’19, we were unfortunately too far behind to make the Drive Off portion of the International Rat Rod Build Off/Drive Off, so we were now planning on meeting the guys in Vegas instead. This put us out of contention to win anything in that event, but I didn’t care about winning. I joined to meet some of the best builders in the industry and to show my work alongside theirs.
Next up was figuring out a spot for the tail lights to fit. I decided the best looking option was to cut tail light sized holes in the chains in the rear fenders and recess the tail lights into the chains, thus making them “Frenched tail lights,” a term used for recessed tail lights in panels. This is funny since one of the sets of fog lights out front is called “French fogs” because they are tinted yellow. That means we now have French lighting all around, albeit for completely different reasons then each other. This French addition also follows a side theme of the truck, which is “Around the World.” This theme is displayed in the Japanese, Greek, US, and Spanish blades, along with a Swiss army knife (which also has Marlboro advertising on it enhancing the “smoking” theme of the truck) as a flip-out ignition key. There’s also a glass Canada Dry bottle from the 40’s as the coolant overflow (along with the Canada Dry crate as a tray in the chest), a pocket watch made in the USSR (which existed in the 40s when the truck was made) hanging inside as the interior clock, and the earlier mentioned Canadian coins hidden around the truck.


The main theme of the truck is in its name, Chain Smoker. The biggest way I am physically manifesting the name Chain Smoker is while during a burnout, when the rear tires will be pumping out mass amounts of tire smoke through the wide body kit, making those chains appear to be smoking hence Chain Smoker. Another way I am incorporating the name into the build is through a genie lamp from India (also following the Around the World theme) which is mounted by chains to the windshield. With the addition of some dry ice inside the lamp, the lamp smokes through its tip, and through the chains suspending it. Lastly, one of the later additions now planned for SEMA 2021 is a beautiful chain exit for the exhaust, which will then in turn exit exhaust smoke through the chains once again following the CS name and theme.
If reading this makes you think, ‘Wow this person really put a lot into this truck’, you would be right. I put what felt like every one of my thoughts in 2019 into this truck. Even more significantly is a huge chunk of the ‘retirement funds’ I had been saving over the past nine years of business. Before taking the step to make this a SEMA truck, I thought to myself that this could be the best point in time in my life to do this and if I don’t do it now, then the next time I’ll have the chance to shut off my life like this could be when I retire, when I may not even be physically capable of doing the work any longer. So if I do this now, then when I eventually find the one and have kids then I’ll be able to enjoy this truck with them and my kids will get to grow up sitting in the passenger seat.

We spent a few days finishing up all the wiring with help from three more friends: Dmitry, Val, and Dennis. We got to the point where we were finally ready to try and start our engine! We had some issues on our first attempts, so rather than damage anything, we called in Cutterup Customs diesel engine expert Andrew, who worked his magic and had that beast of an engine running in no time. By now we are down to a week left before CS needs to leave and we have so much work left that I was now working eighteen hours in a row with 3 different crews before retiring to bed in a motorhome out front.


We spent the final few days scrambling to get all the final things done before heading down to SEMA. Those final things were giving us so many hang-ups that by the time it came to load up on the trailer to head south, CS had not be driven on the road even once. We weren’t exactly sure how the SEMA setup worked, but we were confident enough that we could get away with a few blocks of driving at most. Making the drive down south was me and my friend, Dario. We left at the absolute last minute and with that planned to make the drive in one straight shot, with one of us sleeping while the other drove, and then also planned to do the same for the drive back home after SEMA. We got to Vegas around midnight just over a day after we left and found a spot near the LV Convention Center to park CS and the tow rig for the night before grabbing a hotel and finally sleeping a full night.


Once we were powered up, I started CS and we rolled over into the starting lineup for this first-ever road drive into our final parking spot. This is where I met the guys I had spent so much time talking with online, Brian and Jeramie from Ratical Rod. Their Drive Off portion of the event across the US went great, and we were now set to stage with a few of them for the SEMA! While they had already put many miles in, I had not. Saying I was nervous about this first drive would have been an understatement. We waited for a little bit and soon enough we were told to start our engines and begin our roll in. That part of things went well, but as soon as I started taking a corner there was nothing but rubbing sounds. There were a few small noises, but it wasn’t until about halfway down the block that a large grinding noise came up. I kicked Dario out to check if he could see something obvious and when he couldn’t I had to pull over and let the team roll in without me (video of this on @chainsmokerrat Instagram). After looking around, I found that the driveshaft ends were rubbing on the floor at full height, so I lowered the bags a bit, took note of the repair that had to be done, and hit the road again. There were still some things that needed to be done but at this point, we were moving! After over 5,000 group hours working including over 2,000 work hours by me, a life dream of mine was successfully completed!


The next day was the first official day of SEMA. In the morning, they had the Battle of the Builders Top 40 announcement. Unfortunately, I was not one of the names called into the Top 40. I felt a little down, but it wasn’t long before I was lifted right back out. My friend Matt had an amazing build sheet designed for me after hearing about my struggles and how I did not have one (everything here is in video form over in the highlights on @chainsmokerrat Instagram). It was after sitting back and noticing that everyone who came into our area bee-lined it straight for CS that I realized others truly did feel the same way that I do about it. I also realized that in the grand picture, it didn’t matter what the judges thought since the most important thing is how happy I am with the build and that I accomplished this life goal of mine to show a vehicle I built on the SEMA world stage.


We hung out with the Ratical Rod crew for the first two nights of SEMA. We went to a party at Welder Up, where Steve started most of his rides for us, which was a real treat. During the day, I walked around SEMA and hung out with CS. Whenever I was nearby, I would see it continue to garner constant attention. I was also enjoying getting lots of nice messages from everyone that had been following the build on Instagram. Many people had been inspired by the build, which is my favorite type of message to get. There were also lots of pictures taken and shared over social media and internet blogs. Through what I saw, I suspect we had around 4-5 million eyes on CS during the show, which far beyond exceeded my expectations!
As SEMA wrapped up, the stark realization about the journey that was about to happen back to Canada hit me like a bottle of maple syrup. Dario had to bail at the last minute, which had set me up to drive back home solo. Cory stayed for a little bit and helped me take the front panels off CS. By the time I got home, unloaded, and finally caught up enough that I was able to take a day off, it had been 112 days working straight. When I finally unwound, it felt a little weird to do nothing for a day, but it was my most well-deserved day off to date. Overall, the build took a huge toll on me. I had gone from 185 lb to 155 lb throughout this build, so it was time for some better-planned meals and a more regular work schedule again.


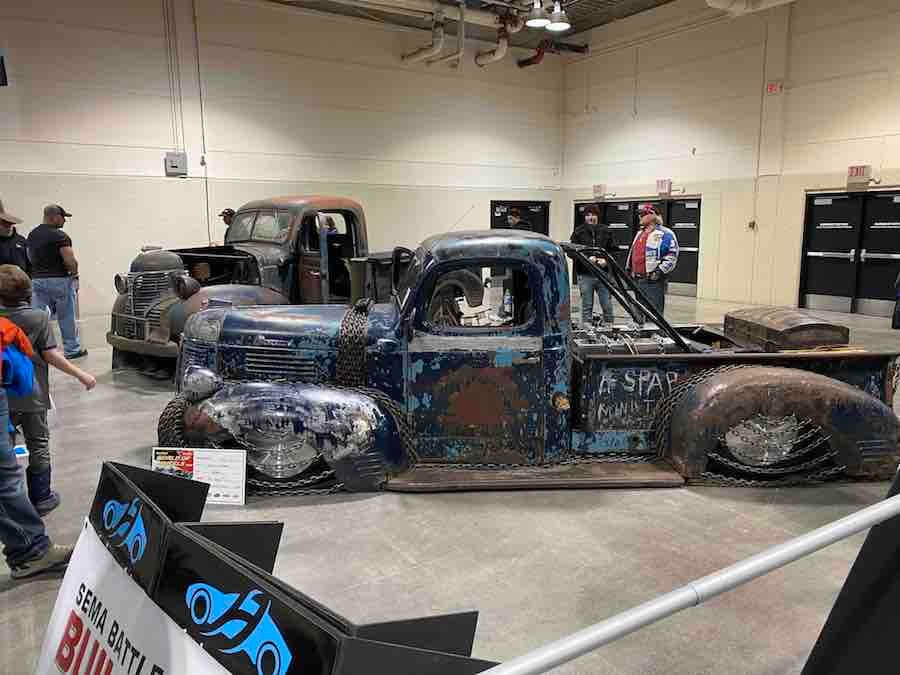
Cue a few months of CS collecting dust in my garage at home, while I worked my butt off mainly to refill the hole it left in my wallet. About a month after coming home, I got a message from Brodie, with a link to another late 40s Fargo that was for sale just south of Calgary. I had told myself I wouldn’t do any purchasing regarding CS for a little while, so I told Brodie I was going to skip. It was after only about four hours of mulling it about in my brain that I couldn’t take the thought of passing on it, especially with the thought of not being able to find another one of these at a later point when I wanted one. I justified that if I could get it for a good enough deal, then I would be able to use it as a prop for CS. This one would be the Before model (since it looks how CS looked like when this adventure first began, minus having a flat deck) and then sitting beside that would be CS as the After model. This way, you can see the changes that have been done. I negotiated an even better deal on this second Fargo and loaded it up and brought it home with me. Since it had a flat deck when I got it, I had to do some hunting. I was eventually able to find a 40’s Dodge pickup box (which is the same as the one used on the Fargo’s since Fargo is the Canadian Dodge) and was then able to complete the look of it until it looked near identical to CS when CS arrived.
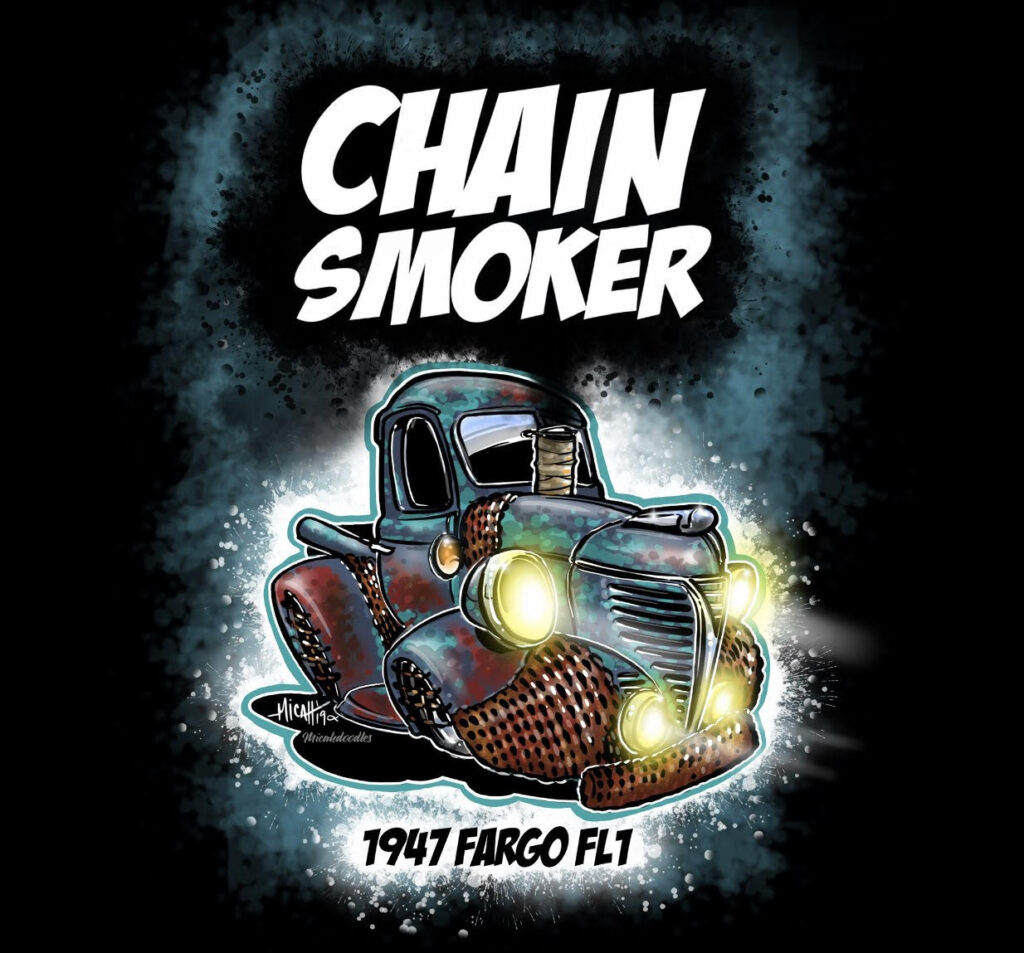
Another thing that happened during these couple of months in that CS got car-tooned by Micah Doodles, which essentially means it was drawn in an old school ‘Ratfink’ style cartoon and is set up to be in a coloring book next year, which I thought was super cool.

February came around quickly and before I knew it we were having to put CS back together for the World of Wheels Car Show, which comes to Calgary every winter. While moving the heavy chain sections, I slipped on ice and 100 lbs of parts came crashing down on my arm/wrist. After a trip to the ER, the doctors luckily did not find any broken bones. They did find some soft tissue damage which required a cast but would heal on its own without surgery.
With the lack of use of my arm, I was relying on Brodie for help with the World of Wheels setup. He was able to get the panels back to the shop and install everything. As soon as I out of the hospital, we were having CS loaded onto another tilt deck tow truck to get it to the Calgary Stampede Grounds where the car show was happening. I had also brought the second Fargo to complete the before and after display. After arriving and unloading, we realized that we were setting up in booth #1, out of however many hundred there were. I’m not sure if that was intentional, but it worked out well either way because our area was set to get a lot of foot traffic. We set up our booth with my mechanical V8 coffee table along with the CS build sheet and some signs taped to the ground showing that second Fargo was the Before and then CS is the After.
The next three days went excellent, with CS getting as much attention as possible. The pin-up girls especially took an interest, with what felt like constant photoshoots going on. Some of the girls even coming back for a second round! It’s certainly rewarding when you can see other people feel the same way as you do about your work. On the final day came the awards ceremony, where CS kept my legs busy, taking me from my seats up top all the way down to the stage on three separate occasions for three different awards! Overall, this weekend had been a huge success, so we loaded up with smiles on our faces.


The next stop for CS was a tow over to Cutterup Auto for Andrew, the mechanic who helped us get running before SEMA, to now get the head leak issue sorted out. I never claimed to be a diesel engine expert and with an engine that has as many performance upgrades and tight tolerances as this, it definitely makes sense to get the experts to do that work. Brodie and I have the advantage of knowing the rest of the body, so we came in and drove CS 20 meters into their shop to begin disassembly. During this short time, both the owner Rob and Andrew had said they thought the engine sounded a little peculiar. They said I should prepare for a dead cylinder (not getting any compression) for one reason or another. I can only expect the worst but hope for the best in times like this. They tore down the head and found that along with a bad gasket causing the leak, one of the valves had come off and the valve spring was no longer sitting right causing no compression in the furthest back cylinder. This wouldn’t be such a huge issue if it hadn’t been caused by the fact that it had its factory 60 lb springs installed in it, unlike the 165lb springs it was supposed to have according to the receipt I got with the engine. Not only that, but it appears as if some contaminants have entered the engine at some point and the cylinder walls are scored. What this means is that the engine needs to come out again and needs to be entirely stripped along with the cylinder walls getting honed and the full engine getting a complete rebuild. After doing a little thinking, it is my belief that the owner in Ontario removed some parts while trying to get it to pass smog, ultimately failing and never bothering to switch back components. Then, during the change, he got some contaminants inside, which ultimately damaged the cylinder walls (and fried out the crank bearings). We took it for what it is and the group of us worked together and pulled the engine out.
Over the course of the rebuild, Cutterup found that while the valve springs may have been wrong, the rest of the engine had all the components that the receipt said it did, so we are still setting ourselves up for the goal of 1,000 horsepower and 1,600 lbs of torque. They also found a few more issues during the build, such as when they were doing the honing they found the cylinder walls were off-centered. It would appear when the block was originally built they did not use a torque plate to simulate the movement in the cylinder made by the head after it has been torqued down. If I’m going to find a silver lining in all this, it’s that if the head hadn’t have leaked then these larger issues would have gone unnoticed and the engine was essentially just a ticking time bomb.

Right around the time when the engine was being finished up, I got another message from Brodie, with an ad for another very similar Fargo for sale. This particular 40’s Fargo was very cool because it had spent its road life as a fire truck and after its active duty was done, its fire truck body was removed. It was then parked for many years and it hadn’t been touched since. That means that everything was there, even the radiator, which is usually the first to get picked for its metal value. The price was also even lower than the last two at only $850 CAD ($625 USD), so I couldn’t say no. I headed up four hours out of town and negotiated it for $650 CAD. My long term goal with it is to buy a tilt deck truck that’s been rolled and the body has been destroyed, then swap the body with the fire truck Fargo using the same chain wide body technique as I used on CS to make the wheels fit in the arches. Then, I’ll have my ultimate towing rig.
I have also come up with some big aspirations for my ‘prop Fargo’, which in the long run I want to build with the exact same body design as CS. However, rather than have it is a Rat Rod style, I want to make it perfectly crisp and clean with perfect panels all painted crispy white, including all the chains! To top off the cleanliness of this unit, I want to put an electric engine in it. Then, I will have two very different and completely conflicting Art Rods, which still carry enough of the same elements to be a matching pair. That’s most likely a long way away, such as that retirement project since I first need to spend some time actually enjoying CS. For the moment, I have these two Fargo trucks which are future projects but have no current purpose. I put some thought into it and have decided my best option is to put them both in the middle of my front lawn and cover them in flowers and vines, thus transforming them into beautiful flower gardens while still posing as ‘post-modern artwork’. I have since applied for the city permit and am hoping to get the approval, but only time will tell there.

Within a week of grabbing my third Fargo, Cutterup finished up assembling CS’s newly rebuilt engine, so Brodie and I headed down there to assemble it back in the body. We also painted the engine and transmission a gorgeous light blue. After that, we were ready for our first startup since rebuild. As usual, we had a few small hang-ups. Once those were sorted out, it started right up and sounded exactly as it should. We warmed it up a bit and checked a few systems before unloading off the hoist and heading out for its first real maiden voyage, from Cutterup to Andrews Auto Gallery. where CS was built. I drove the back roads while Brodie followed me in case anything happened, but it went exceptionally well. There were still more rub points (which were easily fixed when I got back to the shop), otherwise, it was slightly less terrifying than I was expecting. I’d never been in a vehicle that got so many looks, but that could have also been because at this point the grill along with the rest of the front end wasn’t installed. After a rather uneventful drive, I decided to hit up the local Friday night car show, which happens just a couple blocks from my shop. It felt great to bring CS out in public under its own power. To say it stole the show that night would be an understatement.


After sitting outside behind Cutterup for those few months in the rain waiting for the engine rebuild, the chain body panels had enough time to properly oxidize and rust into a completely different look. I had anticipated this, but it was even better looking than I was hoping for. This new look matches the vehicle perfectly. It will allow for a new look when we go to SEMA 2021, which is important. We have a large list of items that we plan on changing before going back so that we are coming back as a whole new ride. This list includes all the things that we never got to finish before SEMA 2019, such as powder coating the frame and building CNC covers for the rear frame sections, along with over 30 other large items. It also includes some new ideas, such as moving the turbos so that they are both parallel above the engine and really in your face. We are also exchanging the exhaust stack for a more subtle side dump setup, which will have chains around them, finally encompassing the chain smoking theme when the exhaust smoke exits through these chains. Once all the items on the list are finished, my vision will finally be complete! Hopefully, the level of workmanship and detail will allow us to show and compete with the best of the best inside the building for SEMA 2021!

For more on Chain Smoker, follow the build on Instagram.
Sponsors
- AutoMeter
- Northern Radiator
- Recon Metal
- Stainless Diesel
- Southbend Clutch
- DCM Classics
- Auto Marine Upholstery
- XDP Diesel Power
- Garage Nishtyaki
- Allen’s & Sons Auto Recyclers
- Auto Value
Engine
- Stainless Diesel 5 blade compound turbos 485/96/1.32 + 366/74/.91
- Stainless Diesel polished 1-piece t4 exhaust manifold
- XDP gear reduction starter
- CPP crate engine 12 valve Cummins
- ARP head studs + main studs + rods bolts
- Hamilton #165 springs
- Hardened rods
- Port and polished
- ZZ Fab intake runner
- Gorilla girdle
- CPP cam 188/220
- Hamilton cam gear retainer
- Haisley Machine fire rings
- Pacbrake 4000 rpm governor springs
- CPP billet freeze plug set
- CPP adjustable pump gear
- Keating rear billet freeze plug set
- Keating billet 1-piece valve cover
- Pensacola vacuum pump
- Scheid timing case + cover
- Scheid billet tappet cover
- Fluidampr harmonic balancer
- BD killer dowel pin kin
- All billet pieces polished
- Hamilton extreme duty pushrods
- Keating lift block off plate
- Vintage exhaust flapper
- DEI tunnel shield
- Mishimoto intercooler piping boots
- Spal 16” electric fans
- Gates aramid fiber belt
- Vintage Canada Dry overflow bottle
- New accessories, oil cooler, sensors, components, lines, fluids…
Cooling
- Northern Radiator high performance intercooler
- Northern Radiator 3 row radiator
- Northern Radiator air conditioning condenser
- Stainless Diesel coolant bypass
- Cold Master air conditioning + heater system
- Wrapped hood exit stack exhaust
- DEI gold heat wrapped intercooler piping
- New hoses, boots, lines, fluids…
Transmission + Rear Driveline
- Southbend Clutch stage 6 triple disc clutch
- NV4500 manual 5 speed transmission
- Haisley Machine bell housing spacer
- Haisley machine input shaft
- Custom driveshaft
- Dana 80 rear differential
- New clutch master, fluids, sensors, joints…
Suspension + Chassis
- Started with 1996 Ram 2500 chassis
- 41” cut off rear frame section
- 14” drop from c-notched rear frame section
- 6 point 1.5” tube roll cage with chain gussets, which extends out cab into rear notch
- tube inner frame bracing
- 4 link rear suspension with watts link
- Tubular front control arms
- Denominator-II airbags
- Viair compressors and air tank
- Slam Specialties valve and controller
- Bilstein 5150 shocks with rear reservoirs
- Procomp limiting straps
- Custom low profile oil pan
- New steering arms, air lines, fittings, ends, pump, mounts, joints…
Fuel
- CPP Hot Street P7100 pump
- DPP competition injectors ~5x.024
- CPP Hot Street delivery valves
- FASS titanium 220gph fuel pump hidden in chest
- CPP .093 fuel lines
- BP shutdown solenoid
- CPP fuel return kit
- Attitude Adjuster adjustable fuel plate
- Twin 64L aluminum fuel cells held down with chains
- Garage Nishtyaki custom gas caps
- New complete steel braided line fuel system with all AN fittings, breathers…
Brakes
- Front EBC Stage 5 Superstreet kit with dimpled + slotted rotors + aramid fiber pads
- Rear Dana 80 disc brake conversion with slotted rotors
- Wilwood hydraulic drift brake
- Wilwood adjustable proportioning valve
- Hurst line lock
- 90s Toyota 4Runner emergency brake actuator assembly
- New brake booster, master cylinder, lines, sensors…
Interior
- AutoMeter Chrono 3-3/8” Speedometer – Model #8188
- AutoMeter Chrono 2-1/16” Oil Pressure Gauge – Model #8127
- AutoMeter Chrono 2-1/16” Oil Temp Gauge – Model #8148
- AutoMeter Chrono 2-1/16” Fuel Level Gauge – Model #8114
- AutoMeter Chrono 2-1/16” Water Temp Gauge – Model #8137
- AutoMeter Spek Pro 2-1/16” Boost Gauge – Model #P30552
- AutoMeter Spek Pro 2-1/16” Pyrometer – Model #P31052
- AutoMeter Spek Pro 2-1/16” Tach – Model #P33452
- Twin Cooper Bussmann fuse boxes
- Sparco 4 point seatbelts
- Fully sound deadened with 2 layers
- Full custom wiring front to back
- Vintage Indian genie oil lamp
- 60s Cadillac Coupe Deville telescoping + tilt steering column and wheel
- 80s Chevrolet headlight switch assembly
- Black carpet with blue stitching
- Chain clutch + brake pedals
- Lokar billet gas pedal
- Boss Phantom component front speakers
- Boss 4 channel amplifier + bluetooth stereo
- Hurst shifter trim
- Custom built cab floor + steering system
- All new handles + switches + ignition, locks, hardware, seals, insulation…
- Interior Aesthetics wrapped real leather
- Custom cut foam bench seat
- Sun visors
- Headliner
- A + B pillars
- Roll bar head protection
- Steering wheel
- Drift brake cover
- Shifter boot
Exterior
- Started with full original patina body complete with every piece/emblem/panel
- DCM Classics windshield and frame
- French (amber) front fog lights
- Front fog lights hidden behind the transition chains
- Rear fog lights/reverse lights hidden behind the bumper chains
- Firewall + door panels + kick panels made from heat exchanger fins out of an oil rig
- Channeled cab down 1.5”
- Vintage Greek Gladius damascus steel sword as shifter lever
- Vintage Spanish Toledo sword as hydraulic drift lever
- US Bowie knife as emergency brake lever
- 90s Honda Civic antenna
- Dual electric windshield wipers
- Hornblasters air horn
- Vintage train whistle and matching air gauge
- Knife door handles
- Hidden trailer hitch
- Vintage Scottish treasure chest housing multiple accessories in false floor
- Twin Optima yellow top batteries
- All new lighting, seals, mounts, brackets…